Warning
Nous commençons tout juste à traduire la documentation pour cette langue, désolé !
Nous affichons des pages traduites partiellement afin de suivre l’avancement.
Cette page n’est pas encore traduite. Mais la bonne nouvelle est que vous pouvez rejoindre la communauté de traduction pour nous aider 👋.
title: First-run setup description: What to expect the first time you open a self-hosted Grist server: the boot login page and the Quick setup wizard.
First-run setup#
The first time you open a fresh, self-hosted Grist server in a browser, you don’t go straight to a spreadsheet. Grist asks two questions first: are you really the operator of this server (the boot login page), and how would you like it configured (the Quick setup wizard)?
This page walks through both. Most administrators only see them once, though both stay reachable later if you need them. See Coming back later.
Boot login page#
Open a fresh Grist install in a browser and you’ll land on the welcome page. No sign-in form, no documents, just a card asking for a boot key.
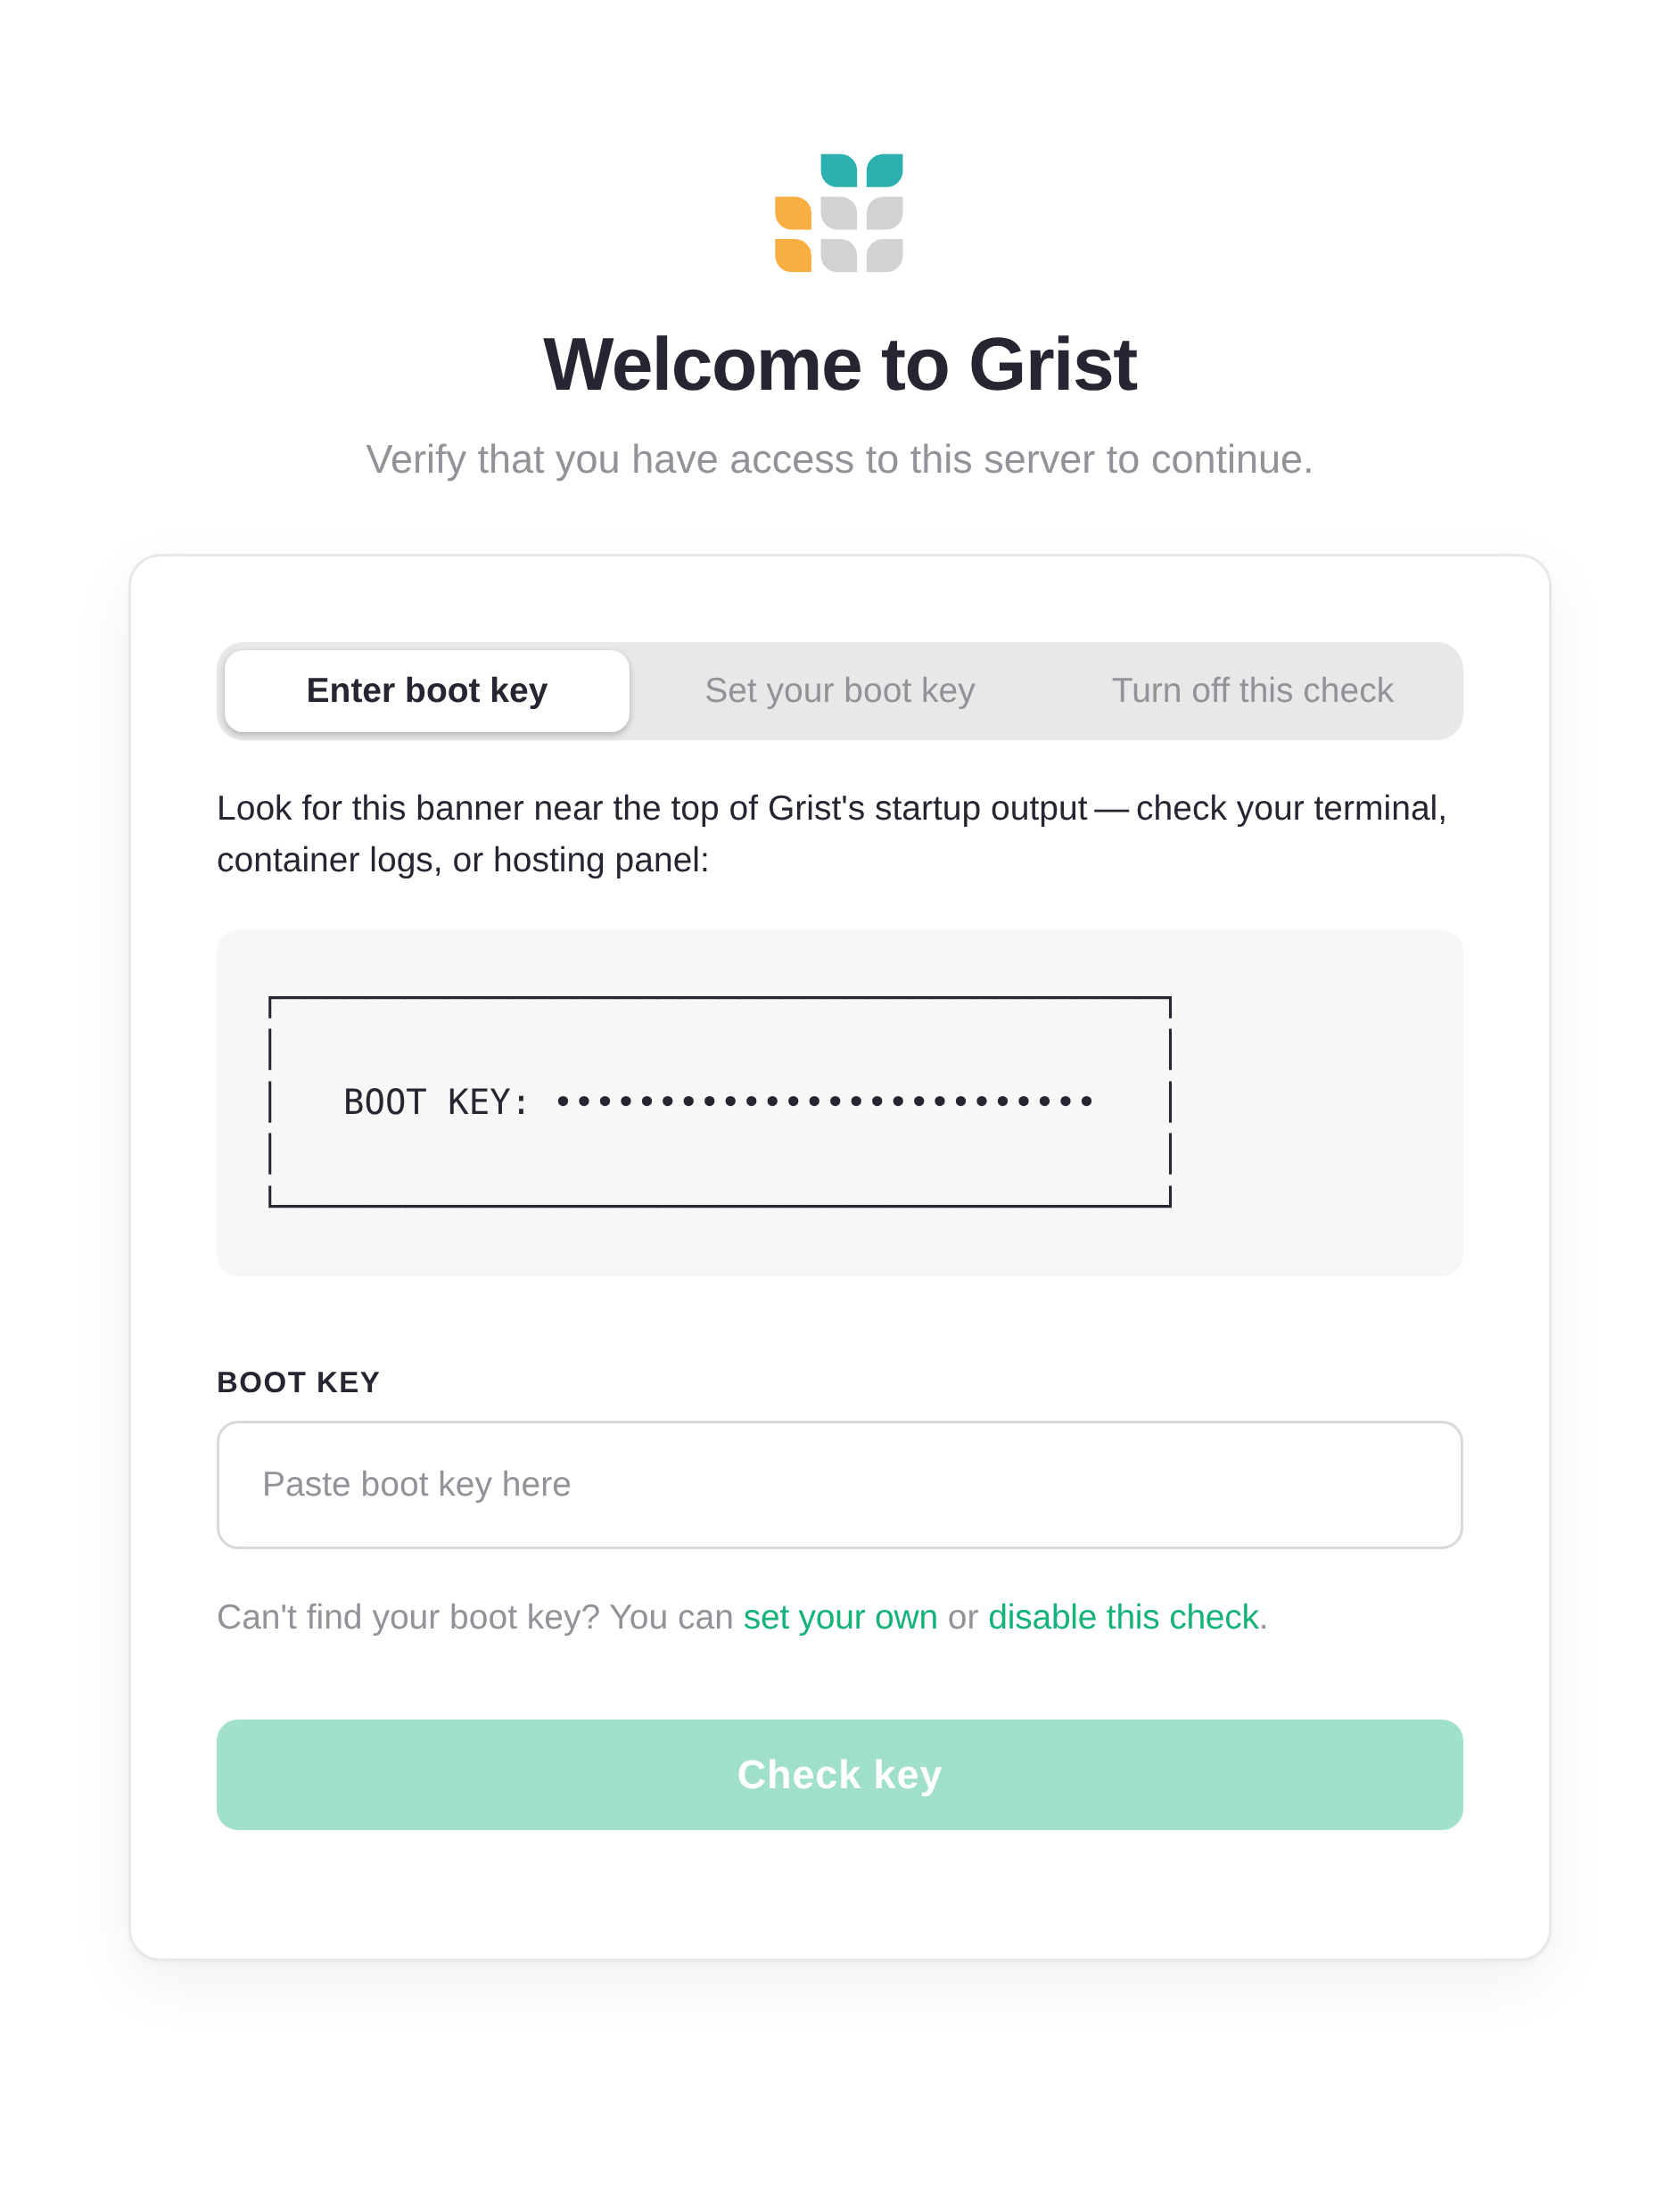
It only appears once. Grist wants proof that whoever is reaching the web app also has access to the machine running it, not just anyone who happens to find the URL. The boot key is that proof.
Grist prints the key into its own startup output. Check your terminal, container logs, or hosting panel for a banner that looks like this:
┌──────────────────────────────────────────┐
│                                          │
│   BOOT KEY: ••••••••••••••••••••••••••   │
│                                          │
│   Use this key at /boot to sign in.      │
│                                          │
└──────────────────────────────────────────┘
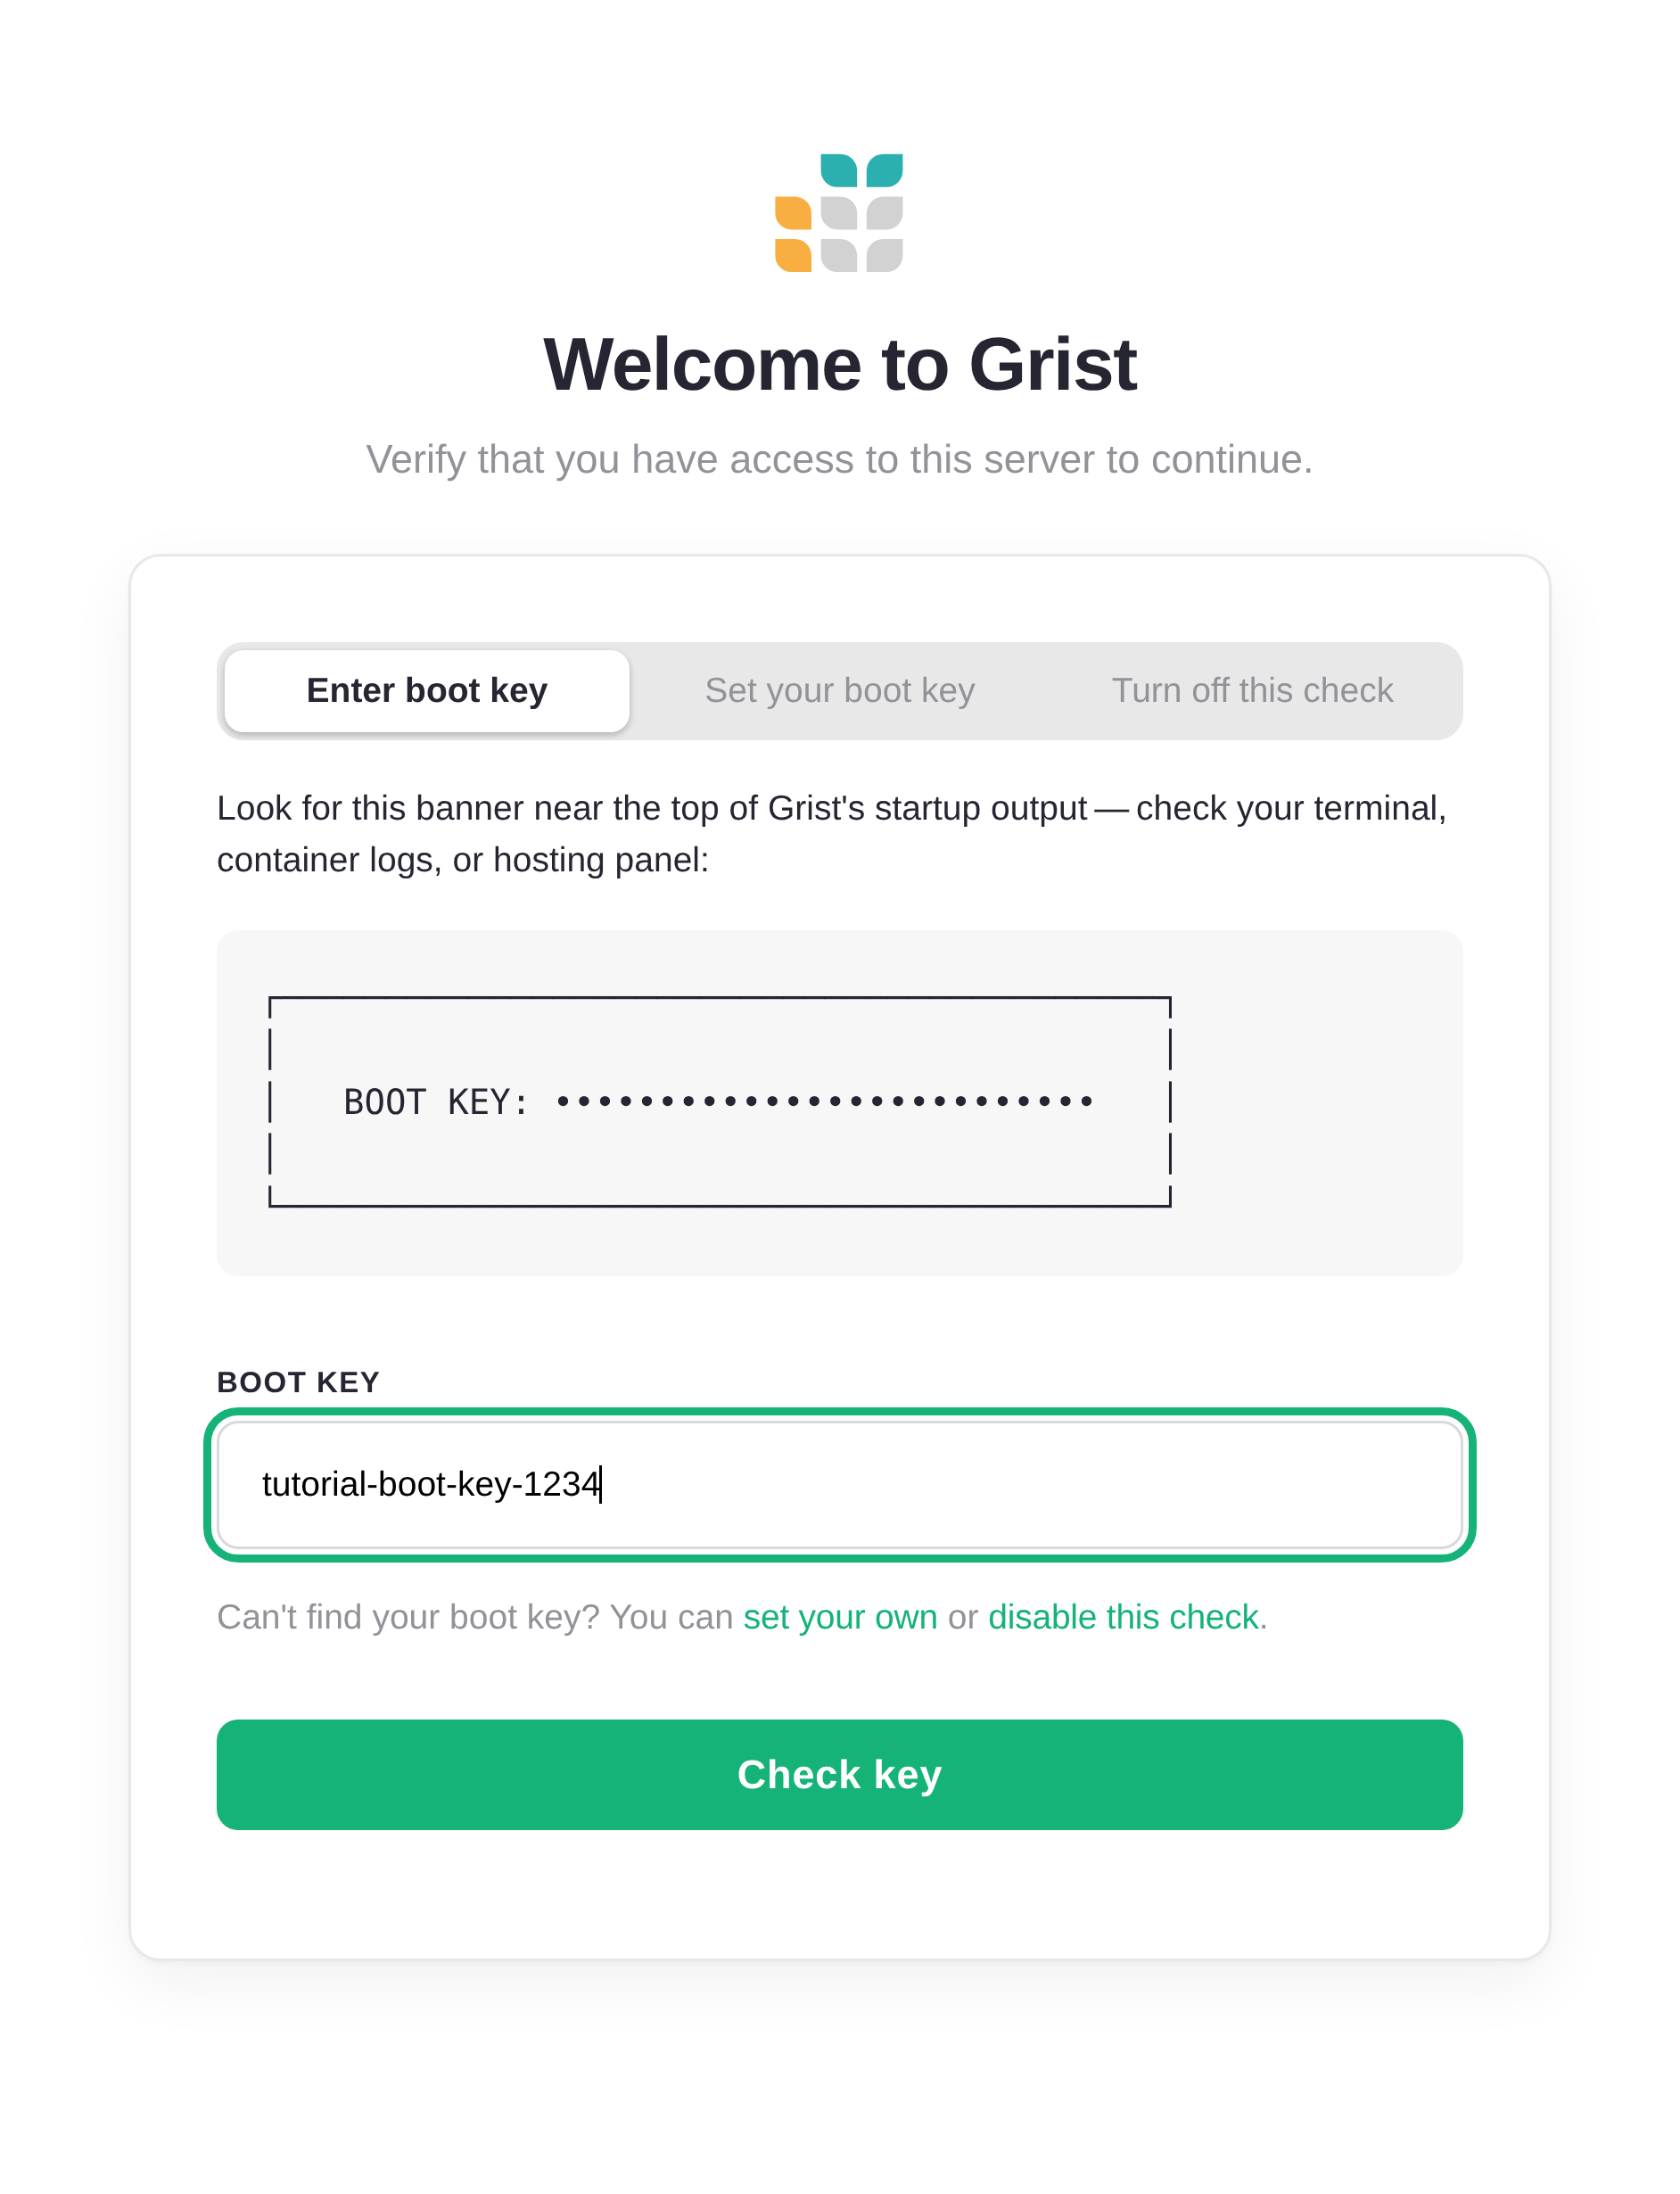
Paste that key into the field and click ‘Check key’.
Set your own boot key#
Can’t see the logs? Maybe Grist is running on a hosting provider that hides them, or in a container you didn’t start yourself. Switch to the ‘Set your boot key’ tab.
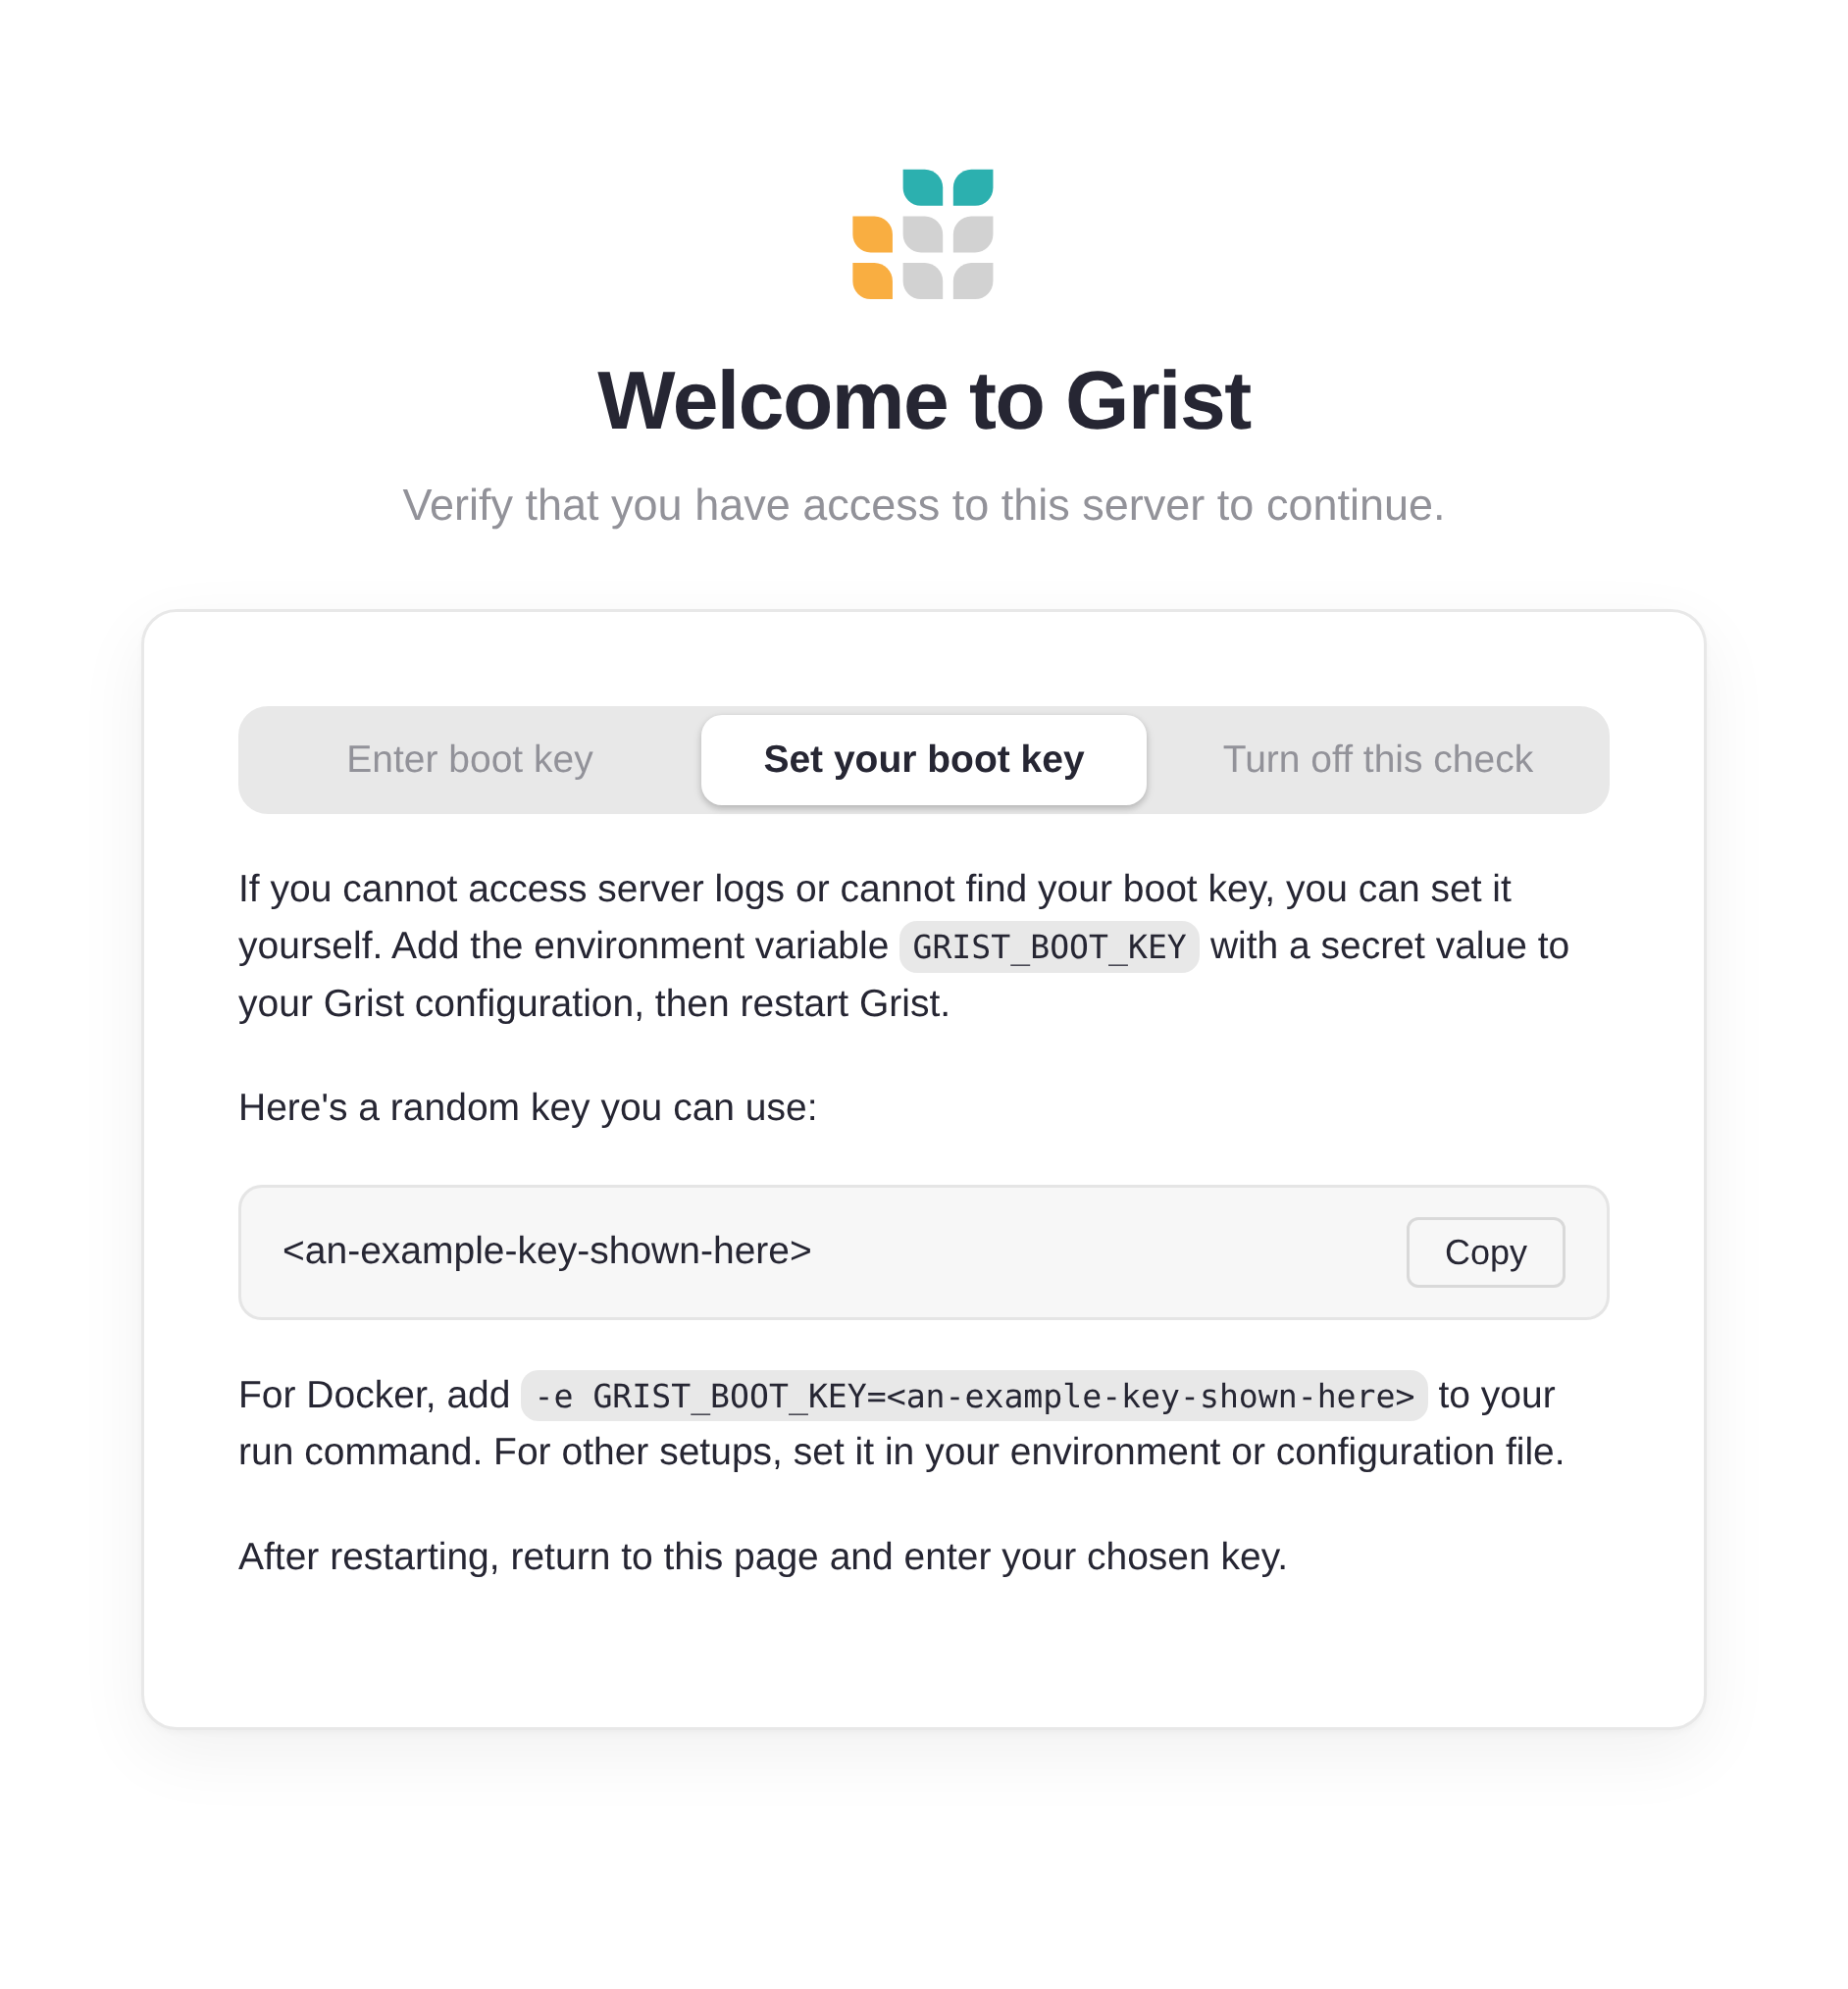
Set the environment variable GRIST_BOOT_KEY to a secret value of your
choice, restart Grist, then return to this page and use your new key. For
Docker, that means adding -e GRIST_BOOT_KEY=<your-secret> to your run
command.
Turn off the boot check#
If your server lives on a private, trusted network where only authorized people can reach it, the boot check is overkill. Switch to the ‘Turn off this check’ tab.

Set GRIST_IN_SERVICE=true and restart. Grist skips the check entirely.
Why the check exists
The boot key proves you have access to the server running Grist. It keeps out anyone who can reach this page but isn’t the administrator. Skipping it is fine on a private, trusted network.
Set the administrator email#
Once Grist accepts your boot key, it asks one more thing: what email address should belong to the administrator account?
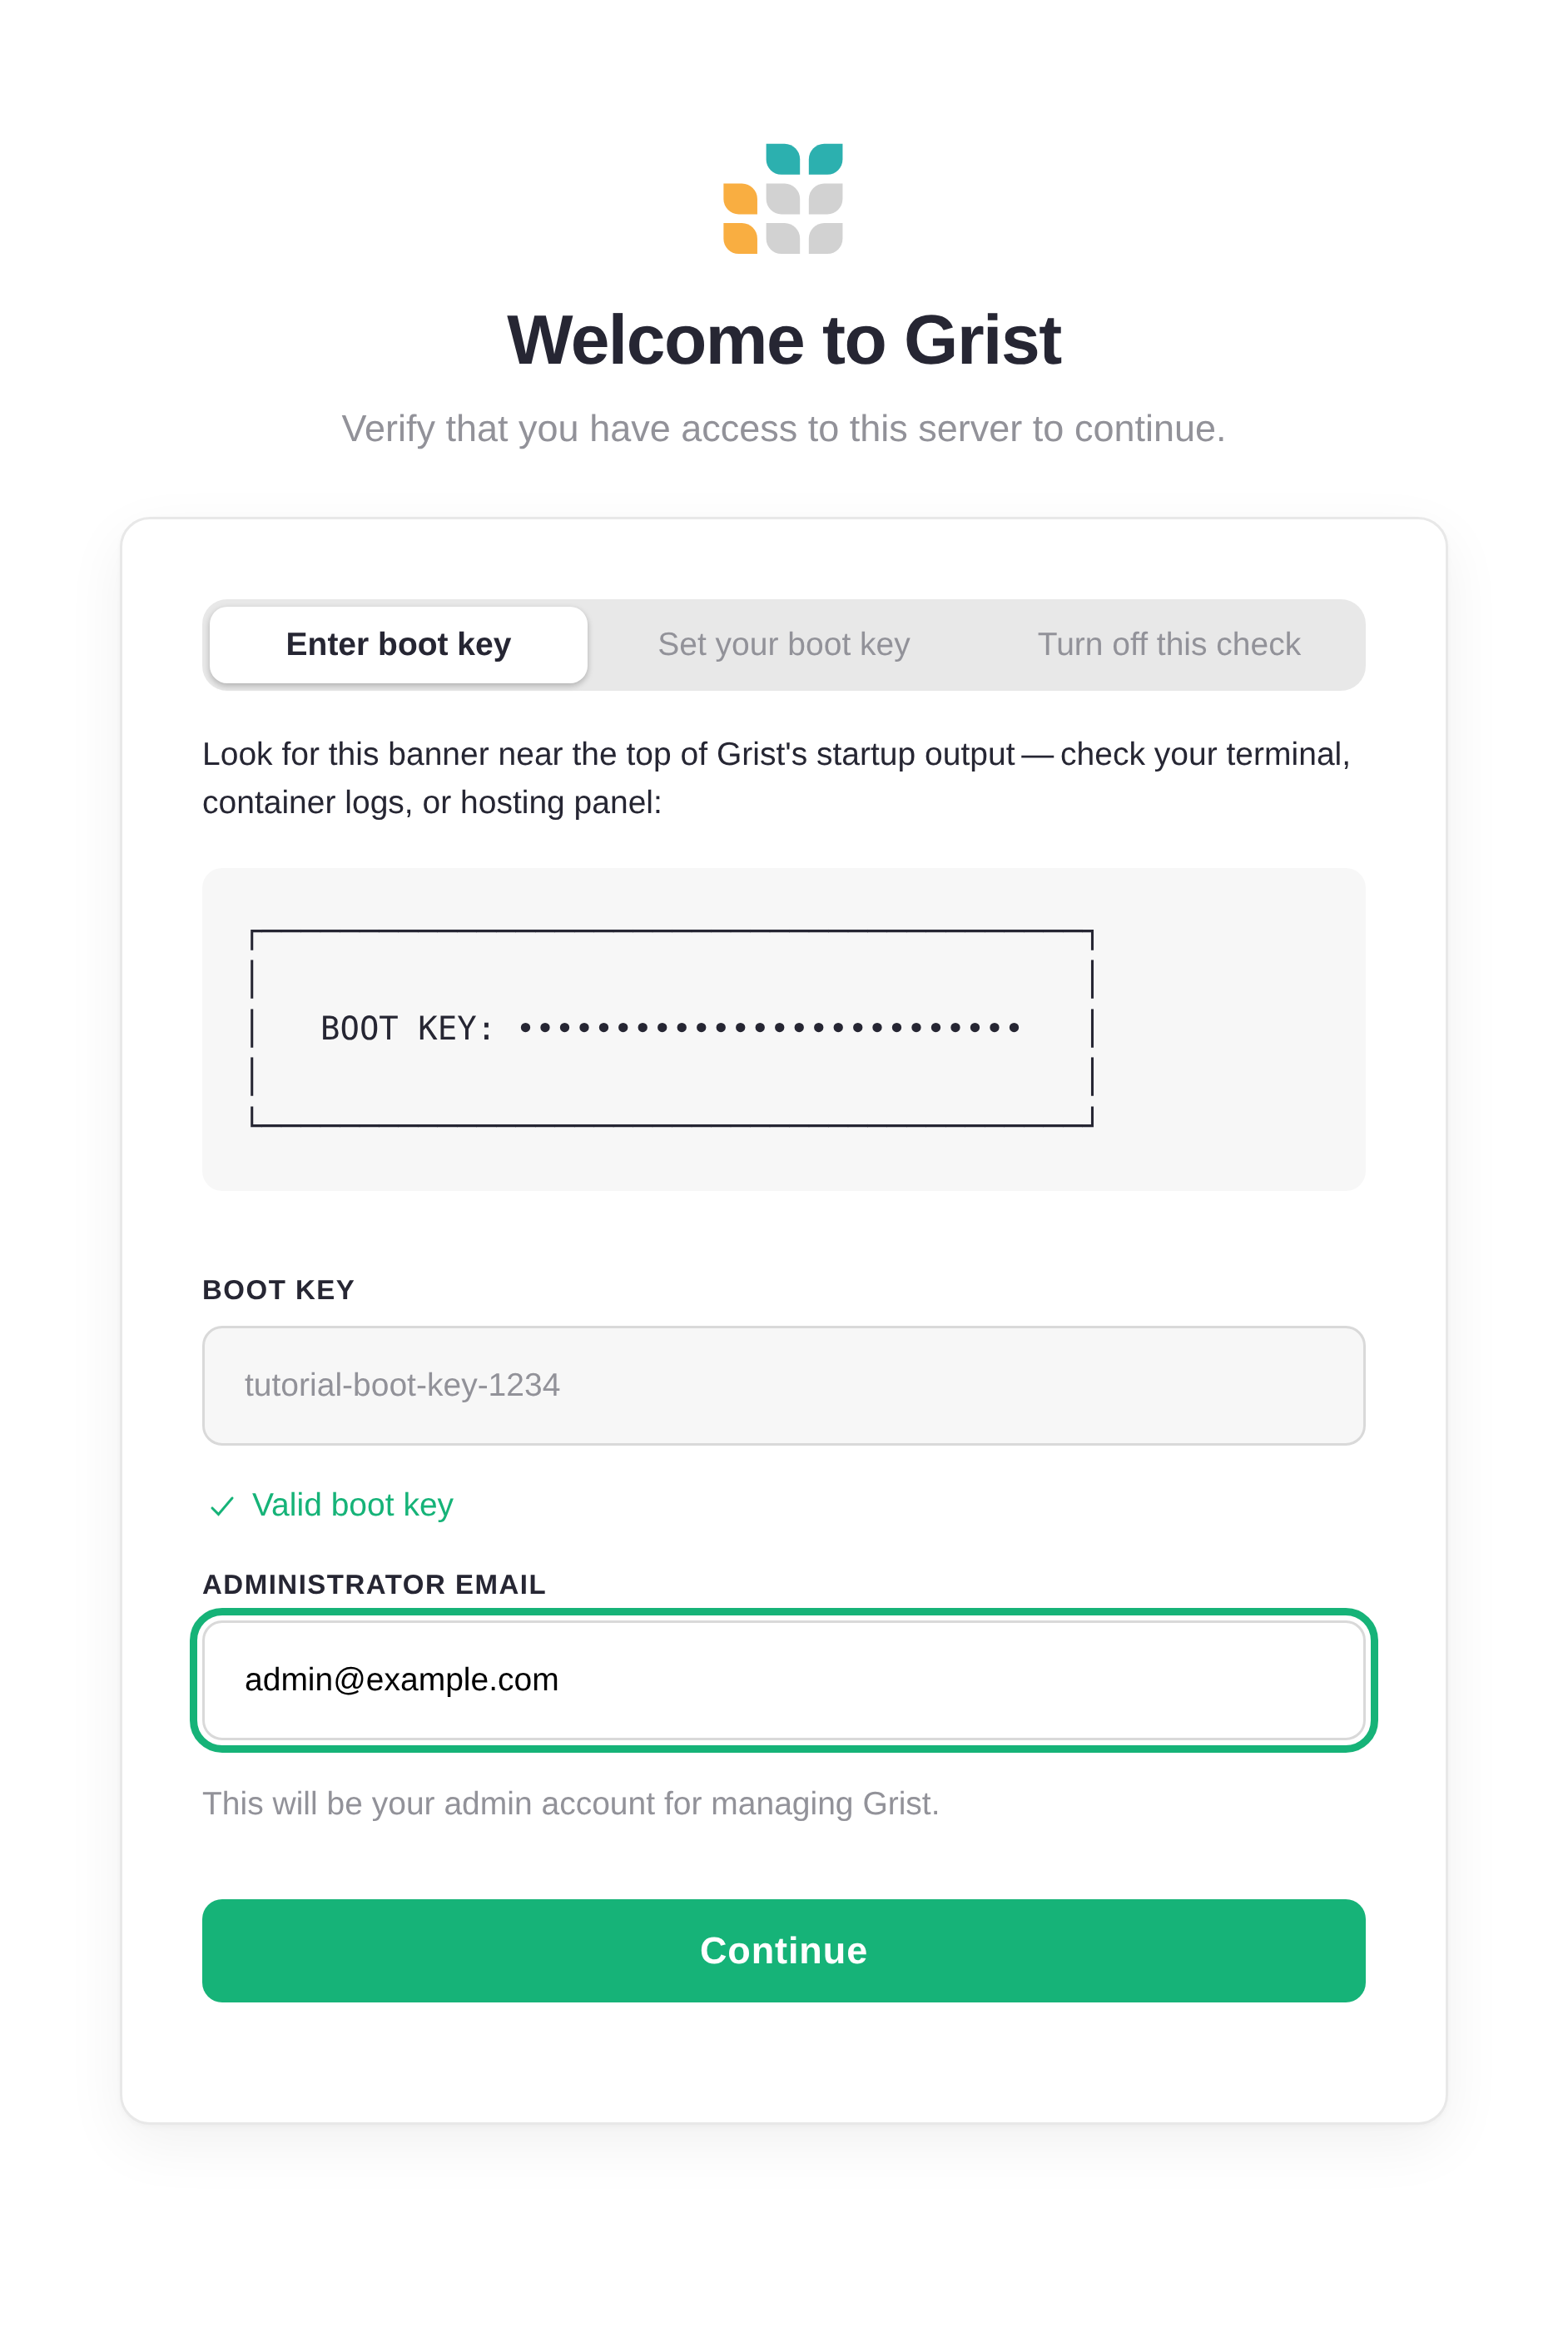
This email becomes the owner of the installation. If GRIST_ADMIN_EMAIL
was set when Grist started, you’ll see it pre-filled and can adjust it. If
not, type the one you’ll sign in with.
Click ‘Continue’. Grist hands you off to the Quick setup wizard.
Quick setup wizard#
The wizard runs you through the handful of decisions Grist needs to make before it can open for business. Each step has sensible defaults, so you can mostly click through, but it’s worth a look. Every setting here can also be changed later from the Admin Panel.
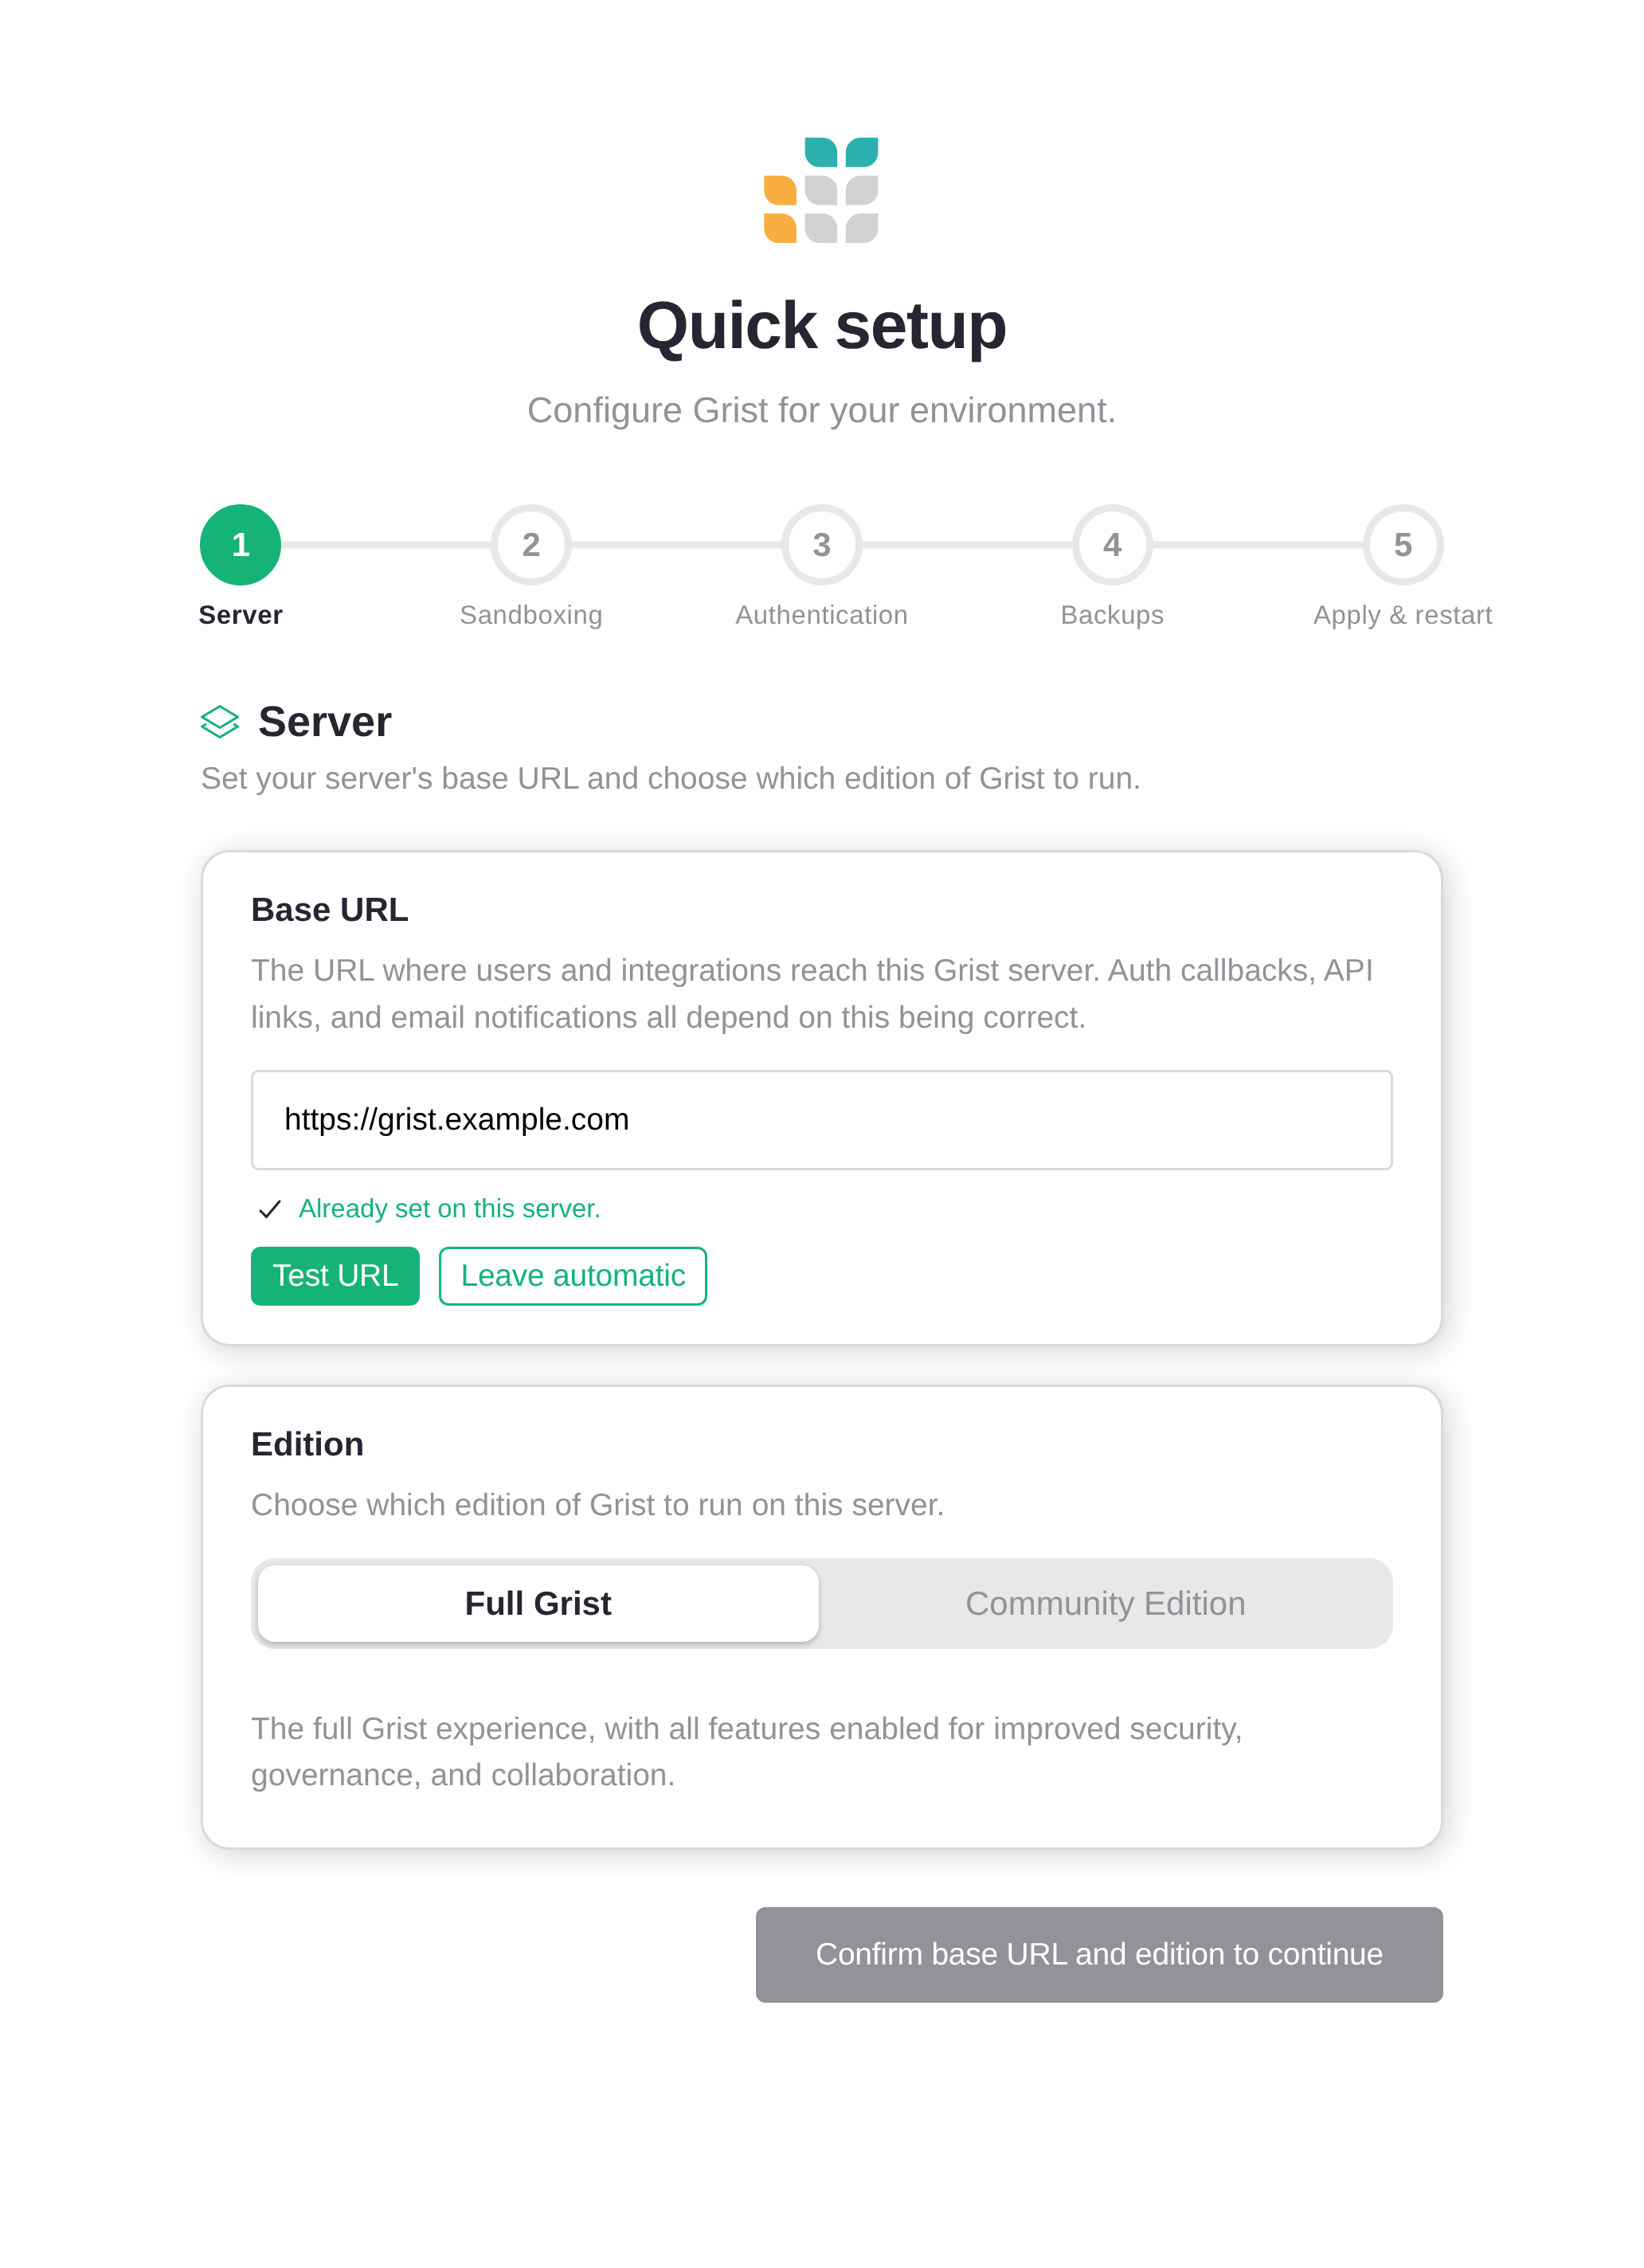
Step 1: Server#
Two settings: the base URL Grist should use for itself, and which edition to run.
The base URL matters more than it looks. Auth callbacks, share links, and email notifications all build their URLs from it. If you’re behind a reverse proxy or HTTPS terminator, set it to the public URL users will type, not the internal one. Click ‘Test URL’ to have Grist sanity-check the value.
The ‘Edition’ toggle picks between the licensed full edition of Grist and the free Grist Community edition. See the edition comparison for the difference.
Step 2: Sandboxing#
Grist runs user-written Python formulas. Without a sandbox, those formulas can read and write anything the Grist process can access. Any server hosting documents from more than one author should have the sandbox enabled.
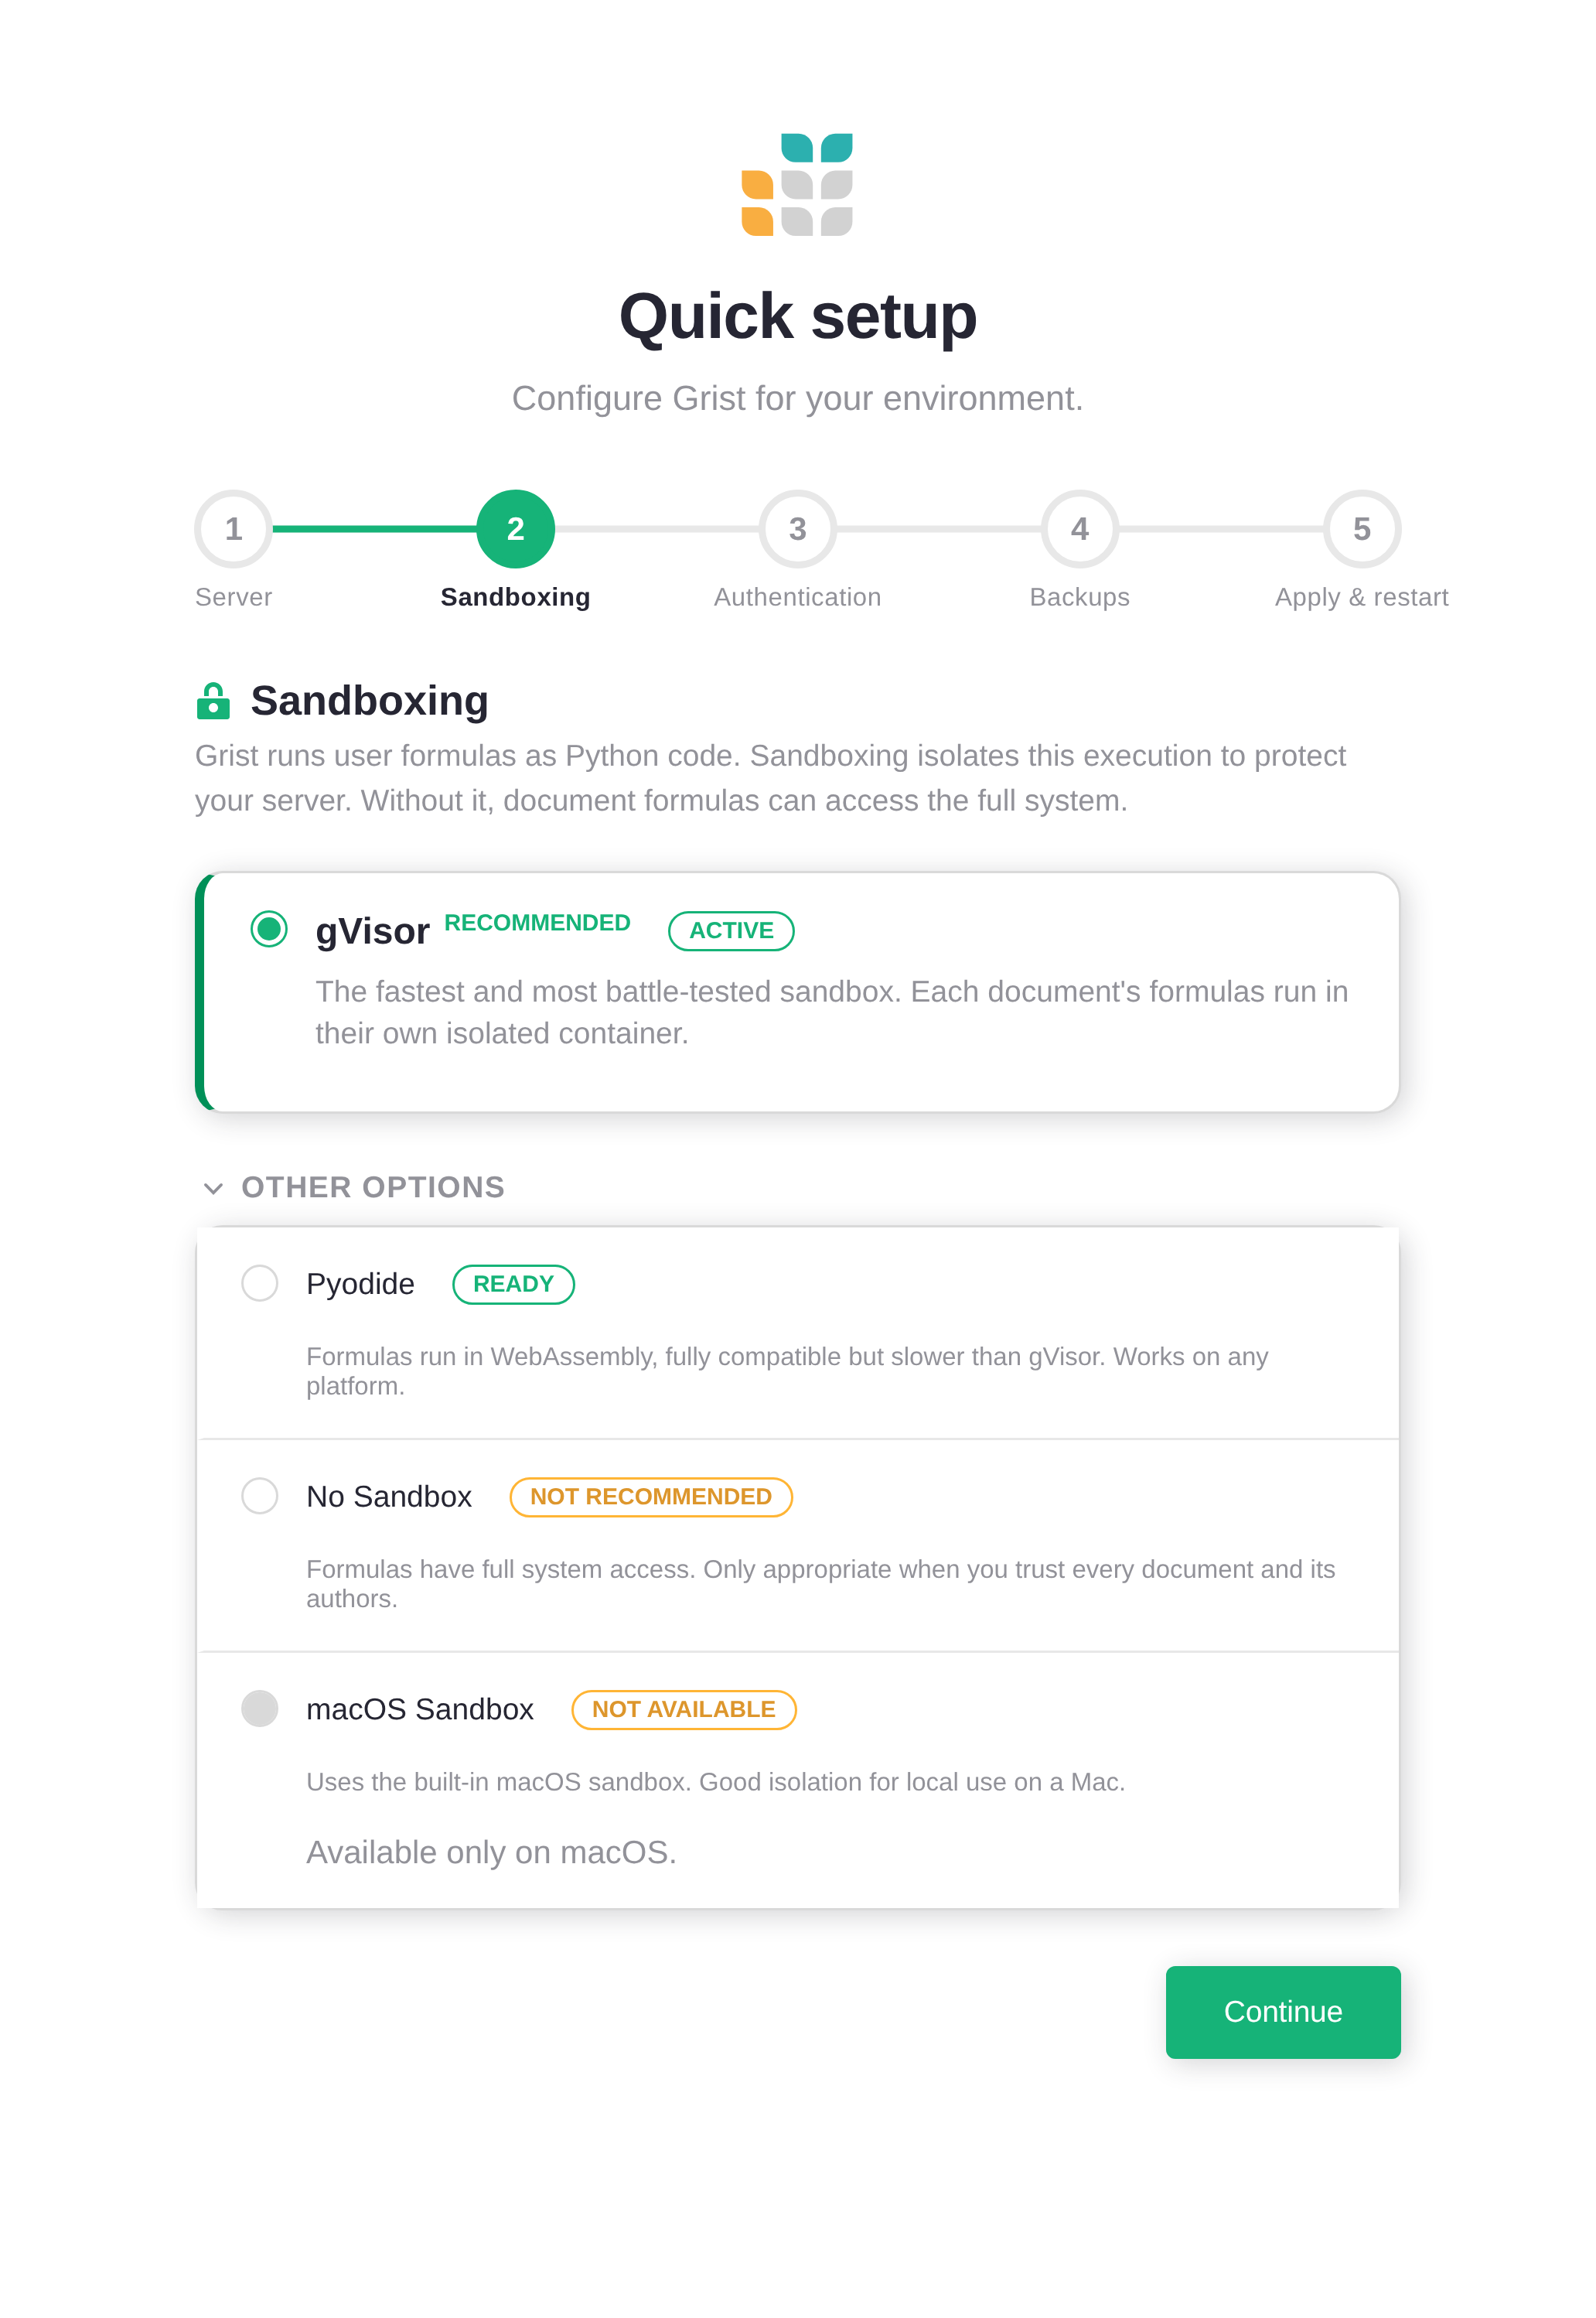
The wizard probes the host and grays out anything that isn’t available. On Linux, gVisor is the recommended choice. Pyodide runs formulas in WebAssembly: slower, but portable.
Already set in the environment?
If GRIST_SANDBOX_FLAVOR is already set when Grist starts, the wizard
shows the current value and locks the field. To change it, edit your
environment and restart.
Step 3: Authentication#
This is the step that matters most for a public-facing server. By default, a fresh Grist installation has no authentication. Anyone who reaches it can read and edit documents.
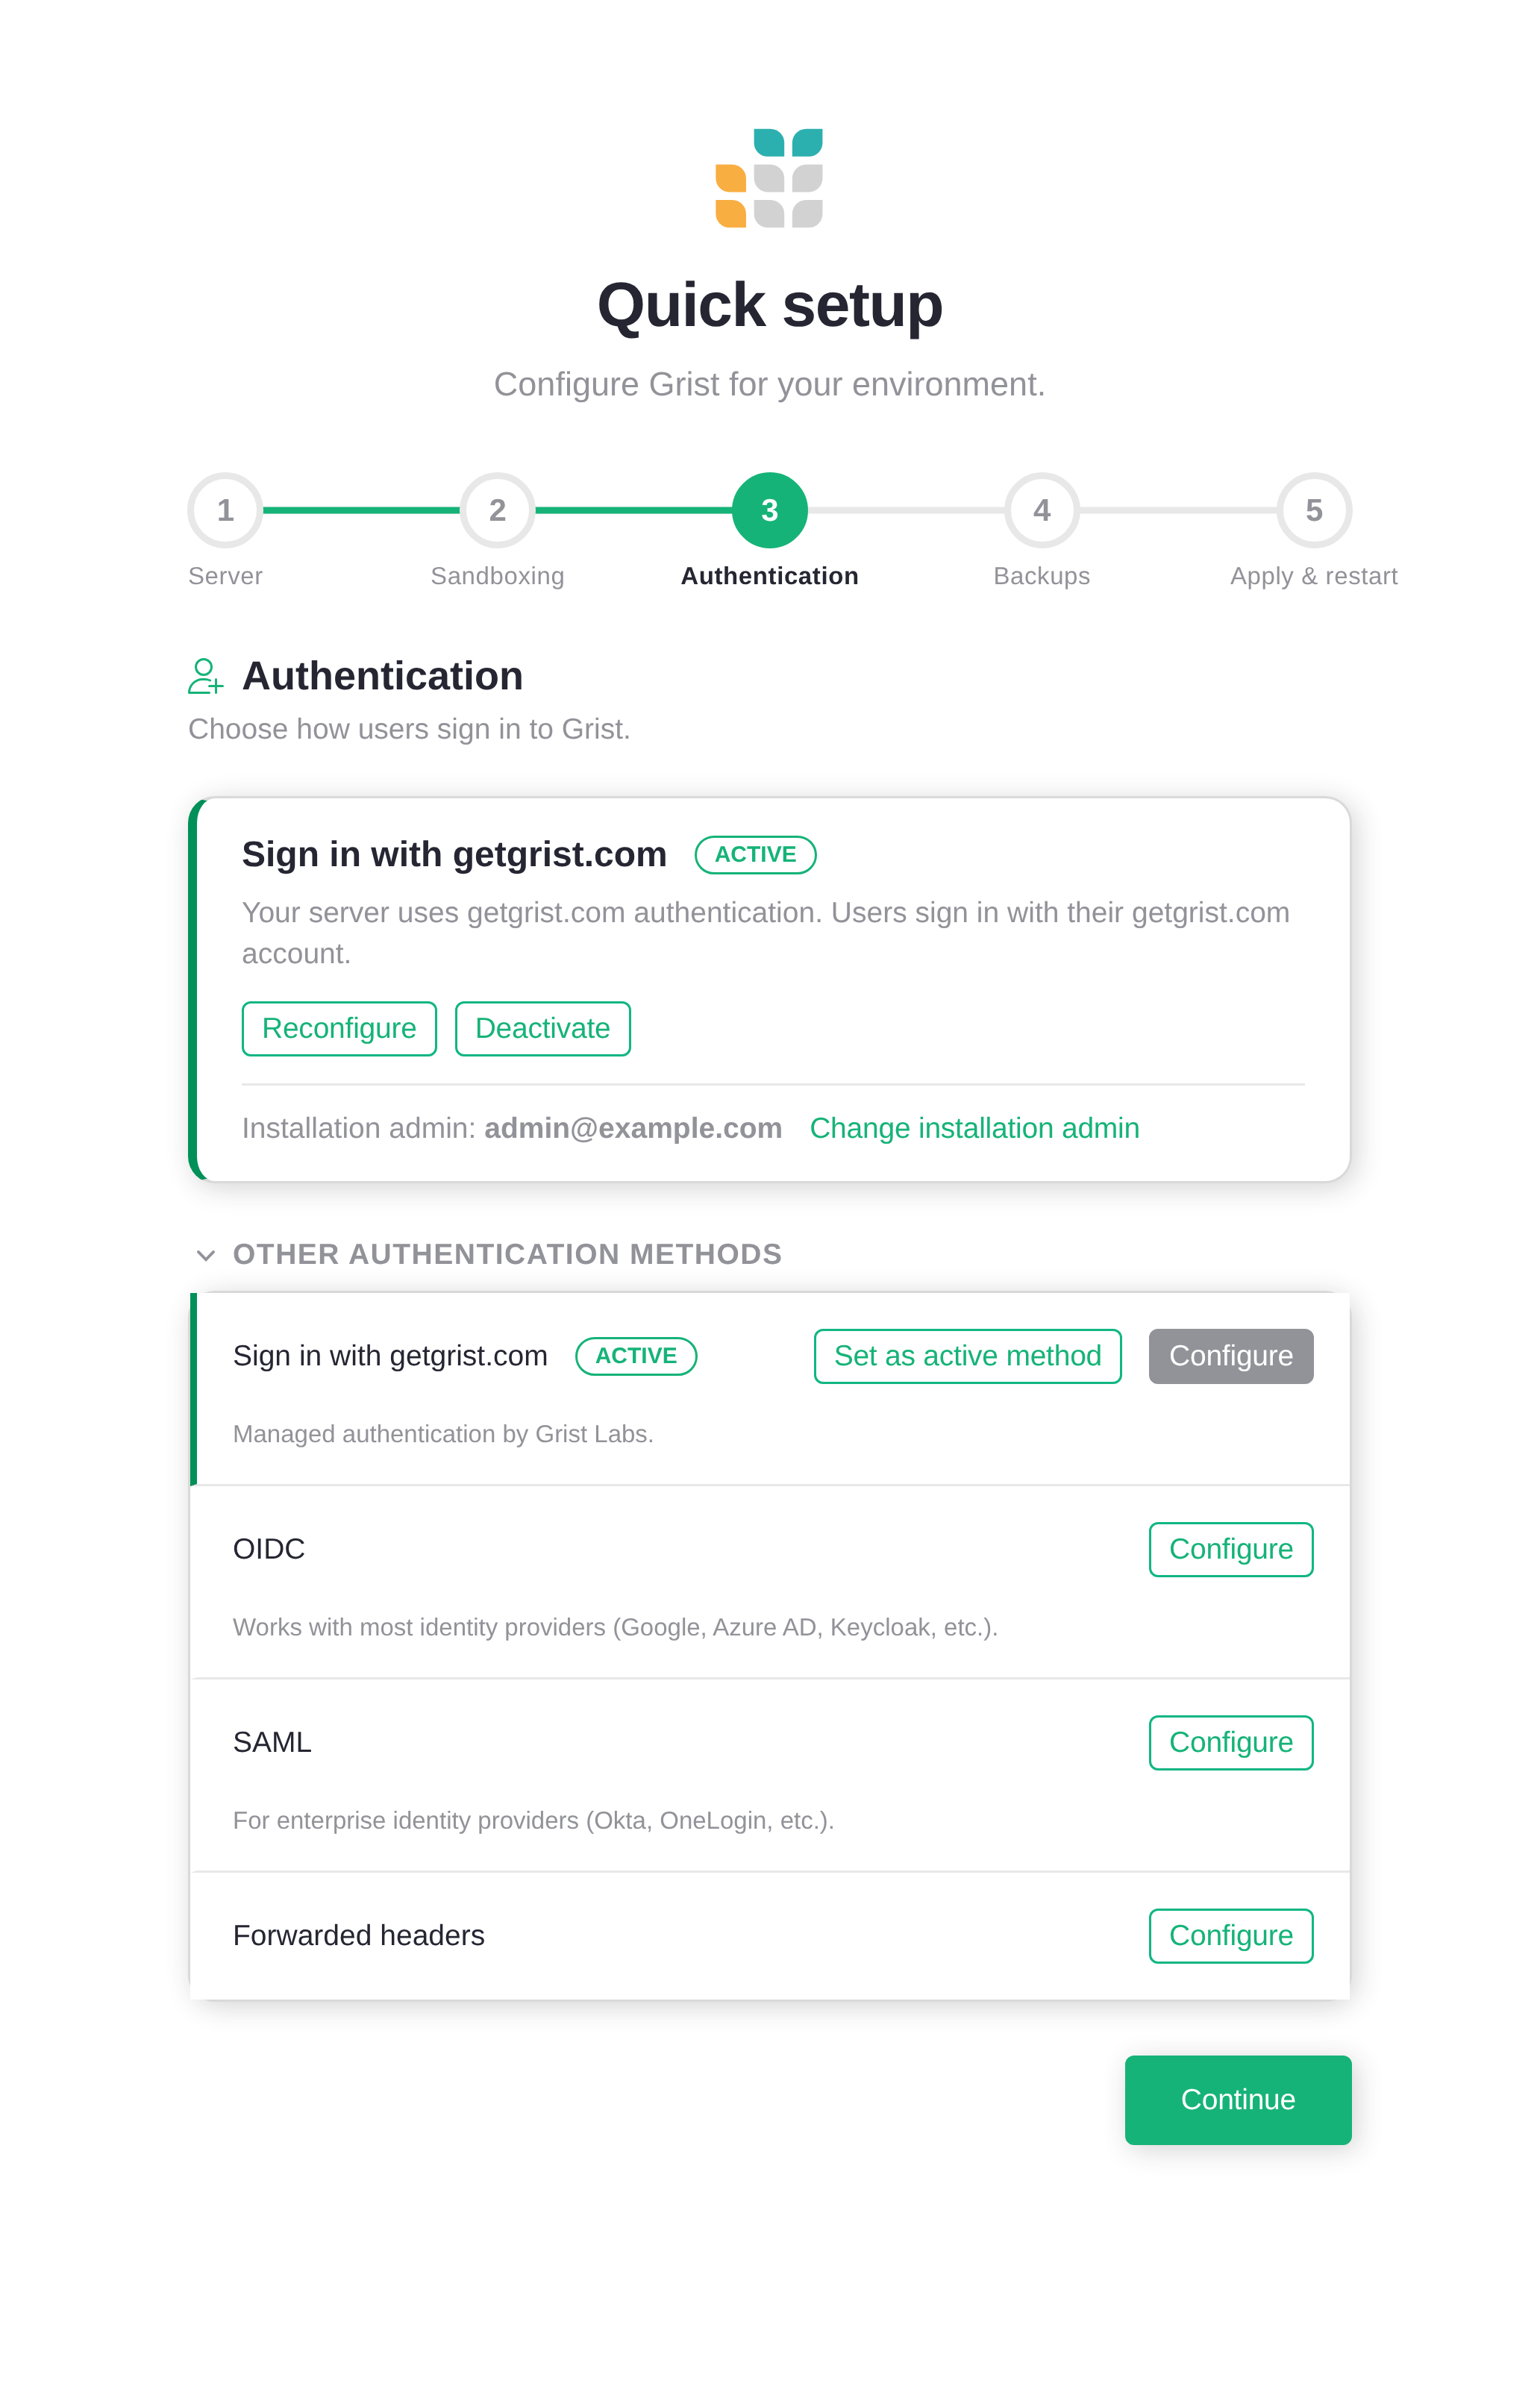
Open ‘Other authentication methods’ and configure one. See Authentication overview for the full list and guidance on which to pick:
- Sign in with getgrist.com: managed auth by Grist Labs. Quickest to set up.
- OIDC: works with Google, Okta, Auth0, Keycloak, and most other identity providers.
- SAML: for enterprise SSO.
- Forwarded headers: when an upstream proxy already authenticated the user.
- GristConnect: for sites that already speak DiscourseConnect.
If you really do want an open server, say, a personal install on your laptop, check the I understand this server has no authentication box and the wizard will let you proceed.
Step 4: Backups#
Grist documents are SQLite files on disk. If the disk fails, they’re gone. Hooking up external object storage gives you off-host backups automatically.
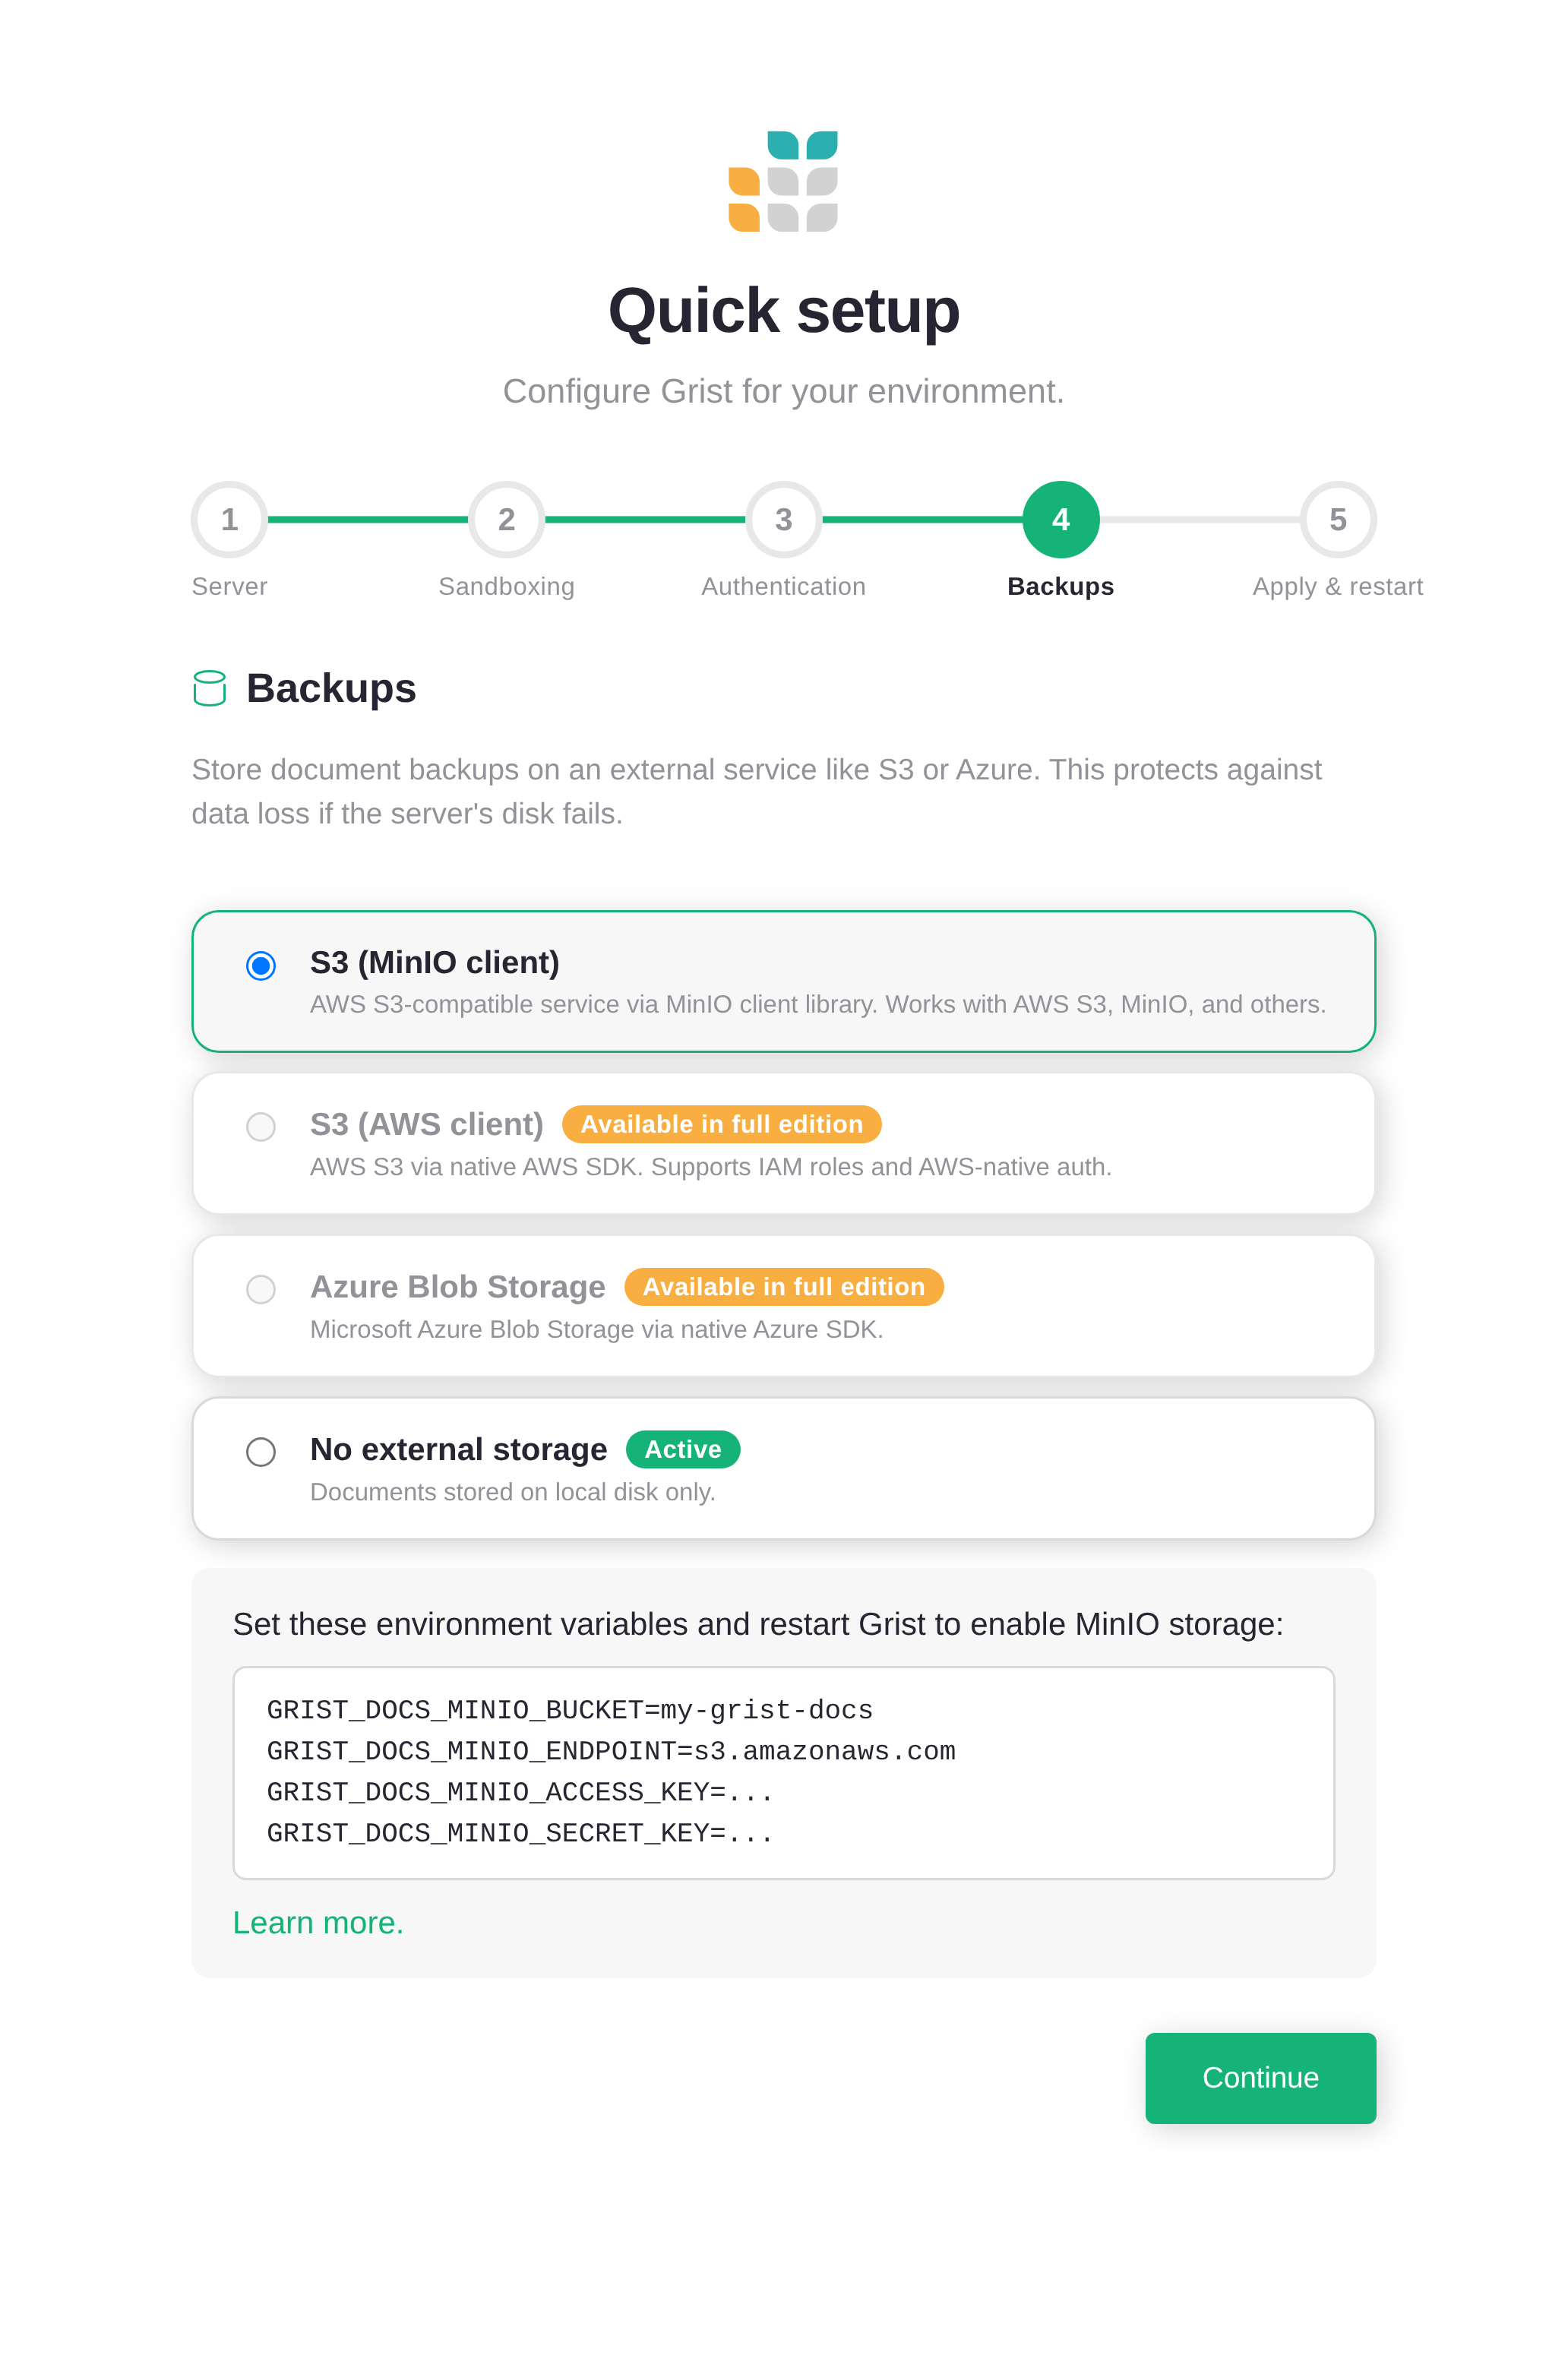
You can pick S3, an S3-compatible service like MinIO, or Azure Blob Storage, or skip this step and configure it later from the Admin Panel. See Cloud storage for the full setup details.
Step 5: Apply and restart#
The last step shows four install-wide permission switches and three presets.
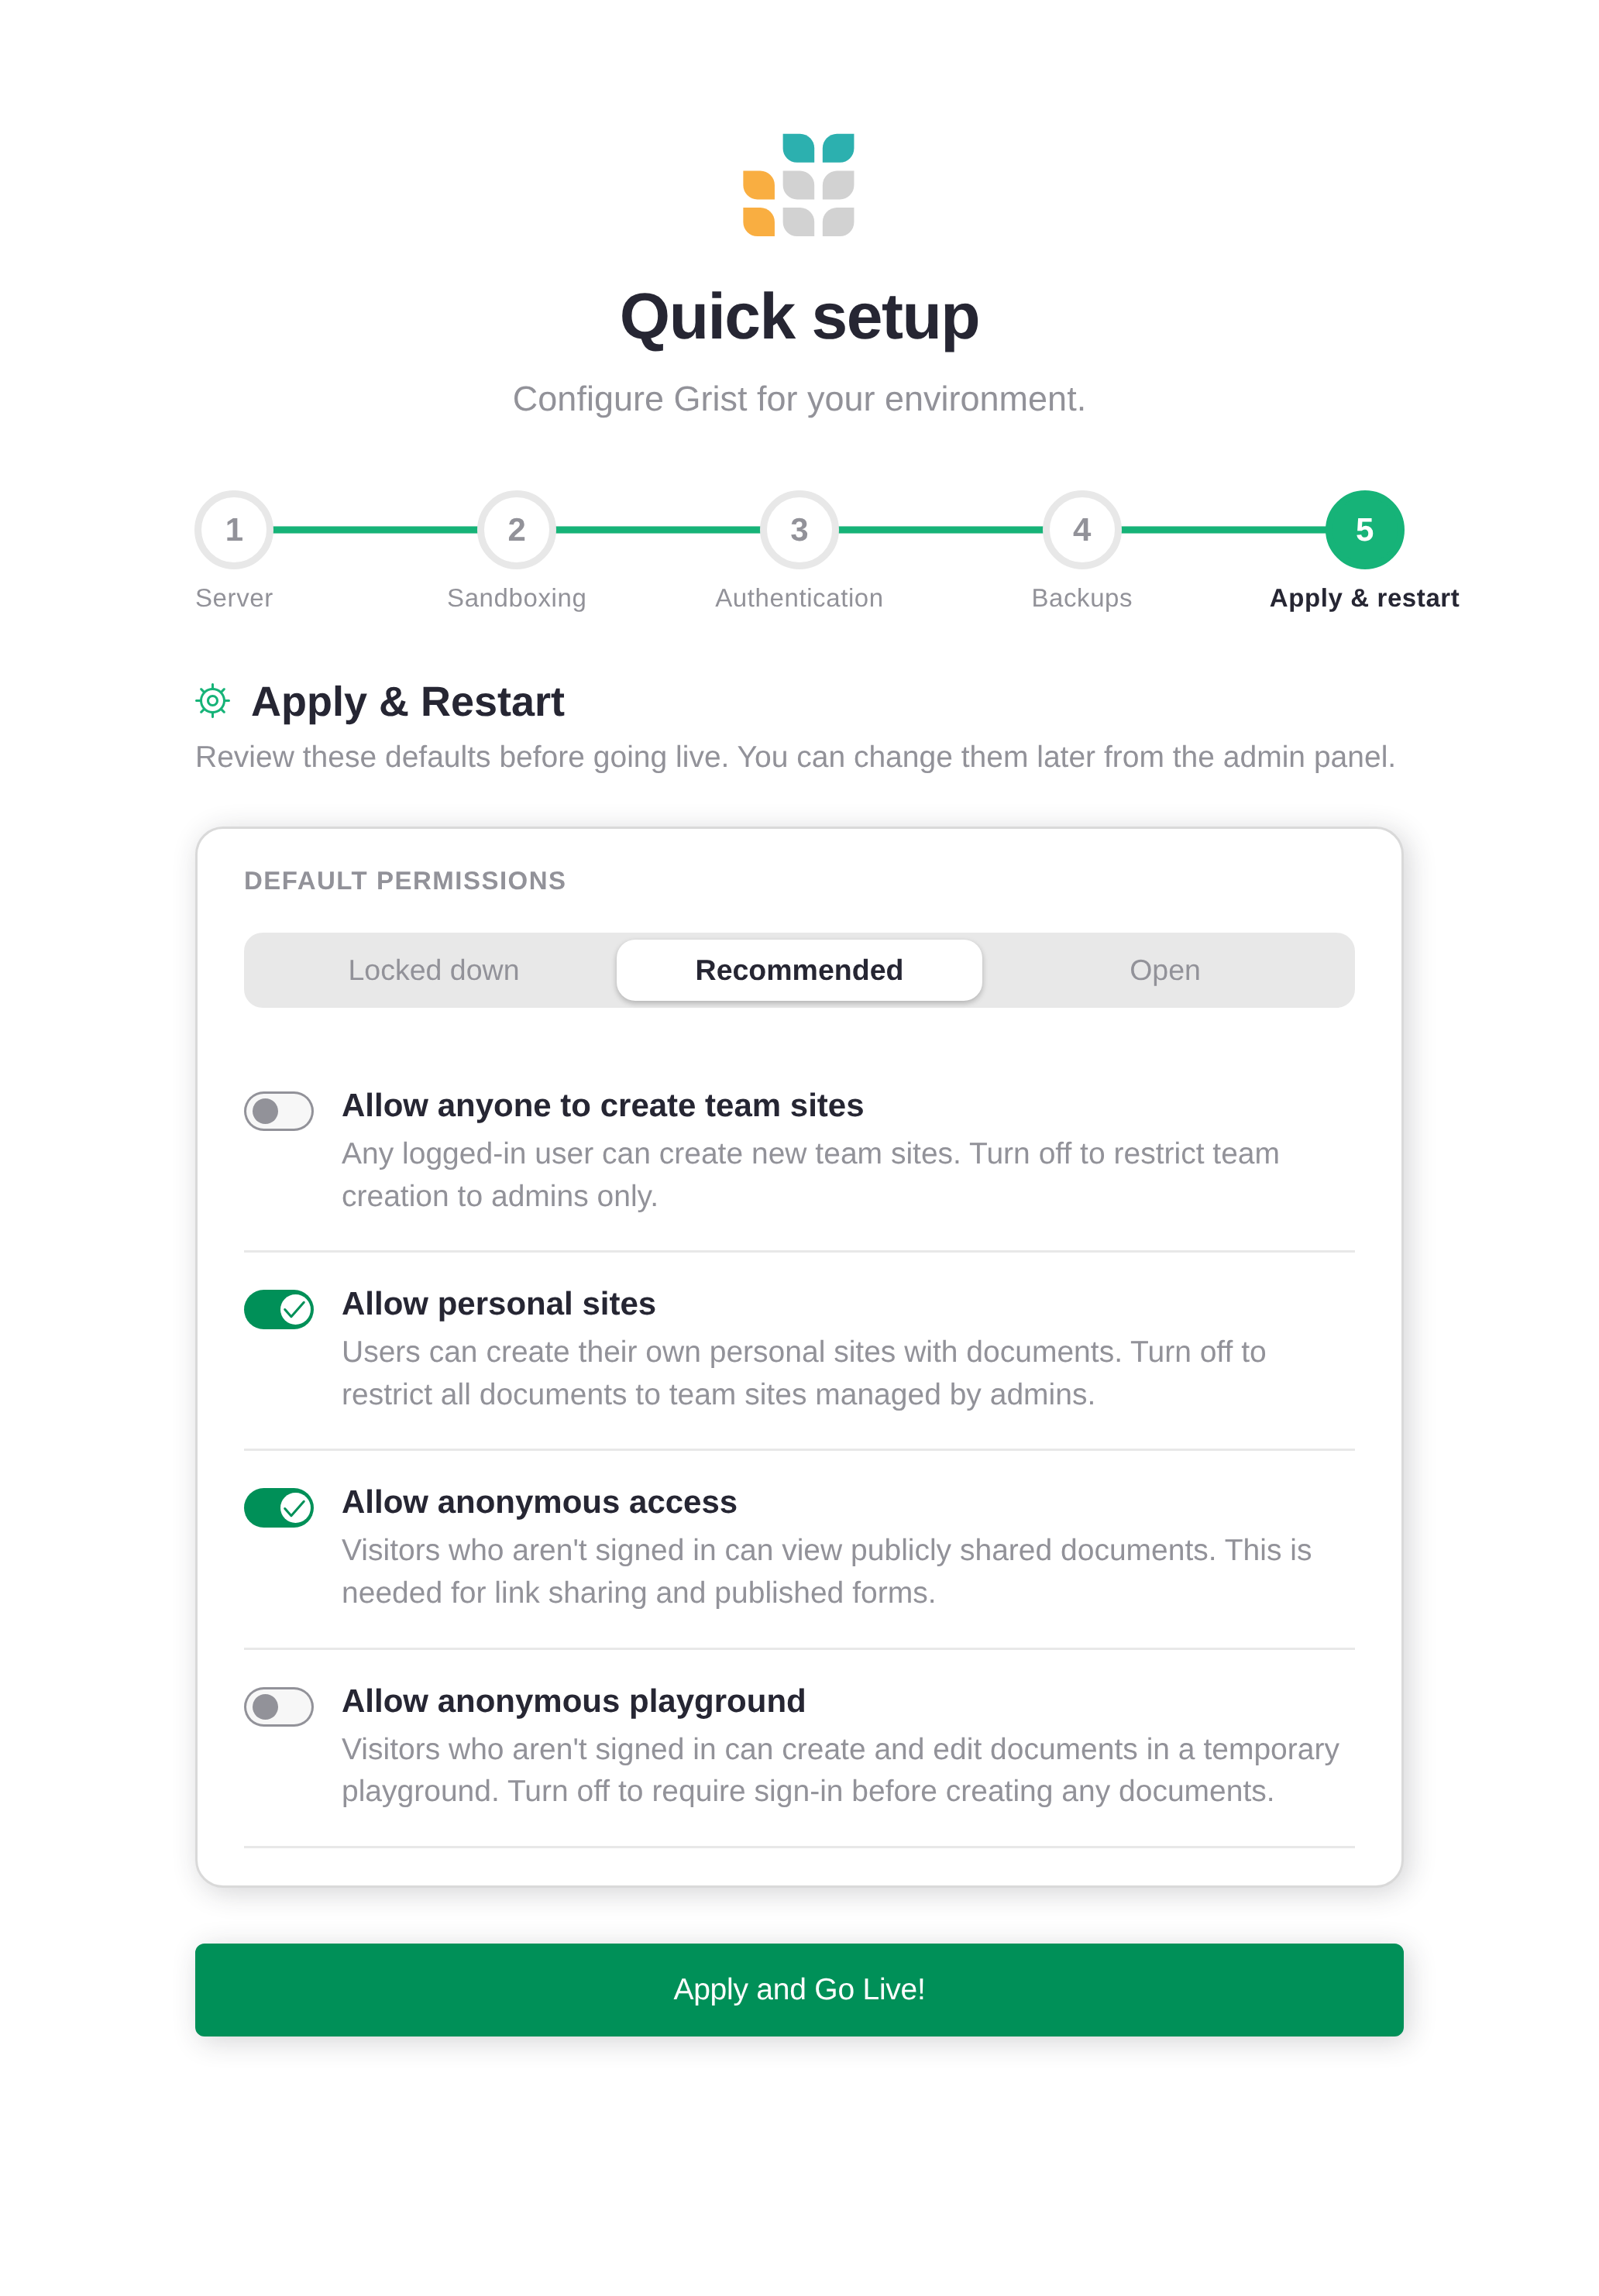
The presets do most of the thinking:
- Locked down: only admins create sites, no anonymous access. Pick this for a single-team, behind-the-firewall install.
- Recommended: personal sites and anonymous viewing on, team-site creation off, no anonymous playground. This is the default.
- Open: everything on. Useful for a public, low-stakes server (and not much else).
The toggles, in plain English:
- Allow anyone to create team sites. If on, any signed-in user can
spin up a new team site. Most installs want this off so admins control
the team list. Backed by
GRIST_ORG_CREATION_ANYONE. - Allow personal sites. Each user gets their own private workspace.
Off means every document lives in an admin-managed team site. Backed
by
GRIST_PERSONAL_ORGS. - Allow anonymous access. Required for public link sharing and
published forms. Off means users have to sign in before they see
anything. Backed by
GRIST_FORCE_LOGIN(inverted). - Allow anonymous playground. Lets unauthenticated visitors poke at
a throwaway document. Off if you’d rather not advertise that
affordance. Backed by
GRIST_ANON_PLAYGROUND.
Going live#
Click ‘Apply and go live’! Grist saves your choices, restarts itself, and switches into service. From here on out, visiting the server takes you to the home screen instead of the setup wizard.
You can revisit any of these settings later from the Admin Panel. Nothing you picked here is permanent: the wizard is a starting point, not a contract.
Coming back later#
The Quick setup wizard stays in the Admin Panel sidebar, under Settings → Quick setup. Open the Admin Panel any time to step back through it.
The boot login page is also still available. Sign out if you’re signed
in, open the Admin Panel, and click
‘Sign in with boot key’. This requires GRIST_BOOT_KEY to still be
set in your environment.