Document tours
Warning
Nous commençons tout juste à traduire la documentation pour cette langue, désolé !
Nous affichons des pages traduites partiellement afin de suivre l’avancement.
Cette page n’est pas encore traduite. Mais la bonne nouvelle est que vous pouvez rejoindre la communauté de traduction pour nous aider 👋.
Creating document tours in Grist#
Document tours are a beta feature in Grist that provide a step-by-step guide to help users navigate and understand how to use your document. You can add document tours to any Grist document by creating a specially configured table named GristDocTour.
What is a document tour?#
A document tour displays tooltips on specific pages or cells in your document, helping guide users through its layout and purpose. This can be especially helpful for onboarding new users or explaining more complex workflows. Many of the templates in our Template Gallery have document tours. We’ll use the Flashcards template as an example as we go through the steps to build a document tour below.
How to create a document tour#
Adding the GristDocTour table#
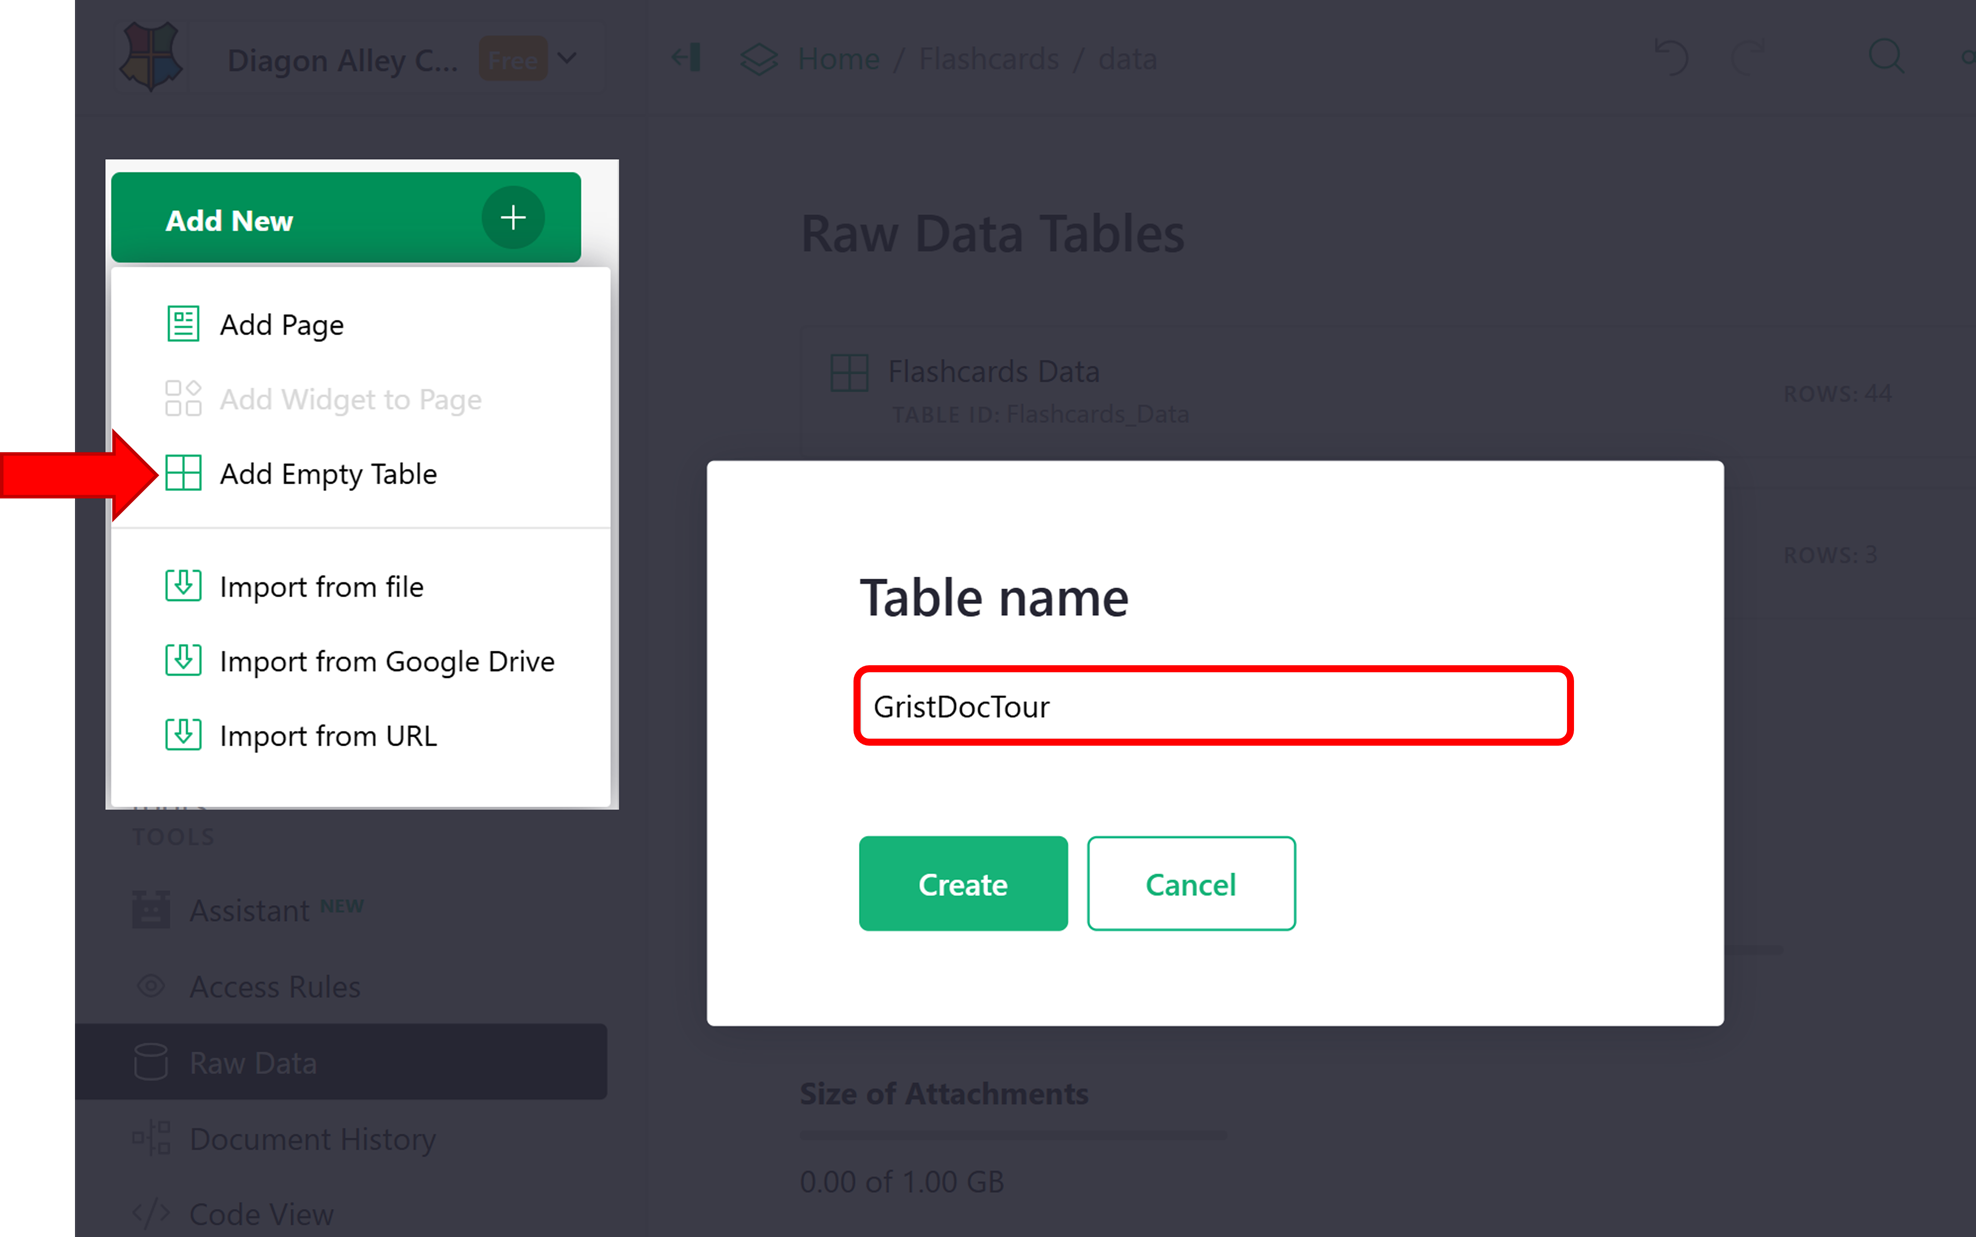
Create a new table in your document by clicking the green ‘Add New’ button then ‘Add Empty Table’. Name the new table GristDocTour.
Add the following columns to the GristDocTour table;
- Title: Text column for the tooltip header.
- Body: Text column for the tooltip content.
- Placement: Text column indicating tooltip position relative to the target (e.g., top, right). https://floating-ui.com/ has an interactive tool that shows how this works.
- Location: Formula column with the formula
SELF_HYPERLINK() + $Location_Cell.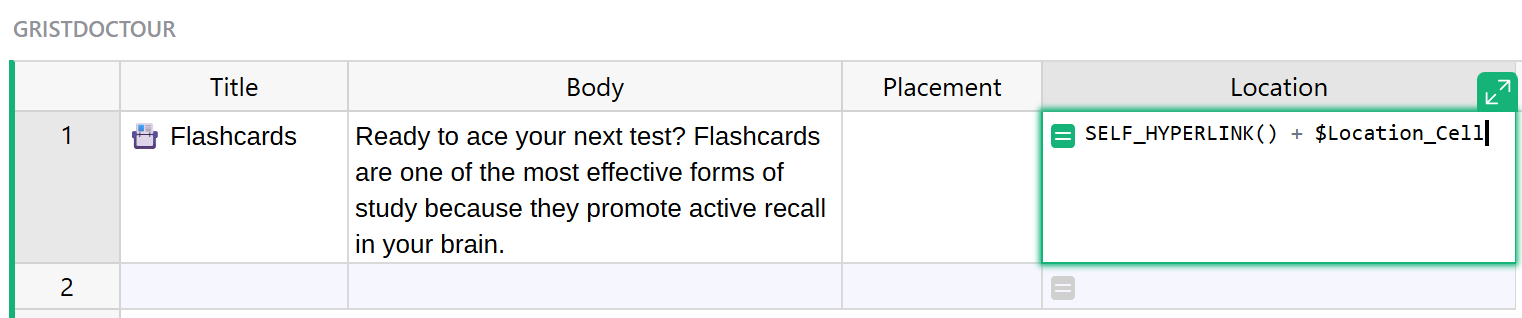
- Location Cell: Text column containing the anchor link of the target cell (e.g.,
/p/8#a1.s21.r1.c7).
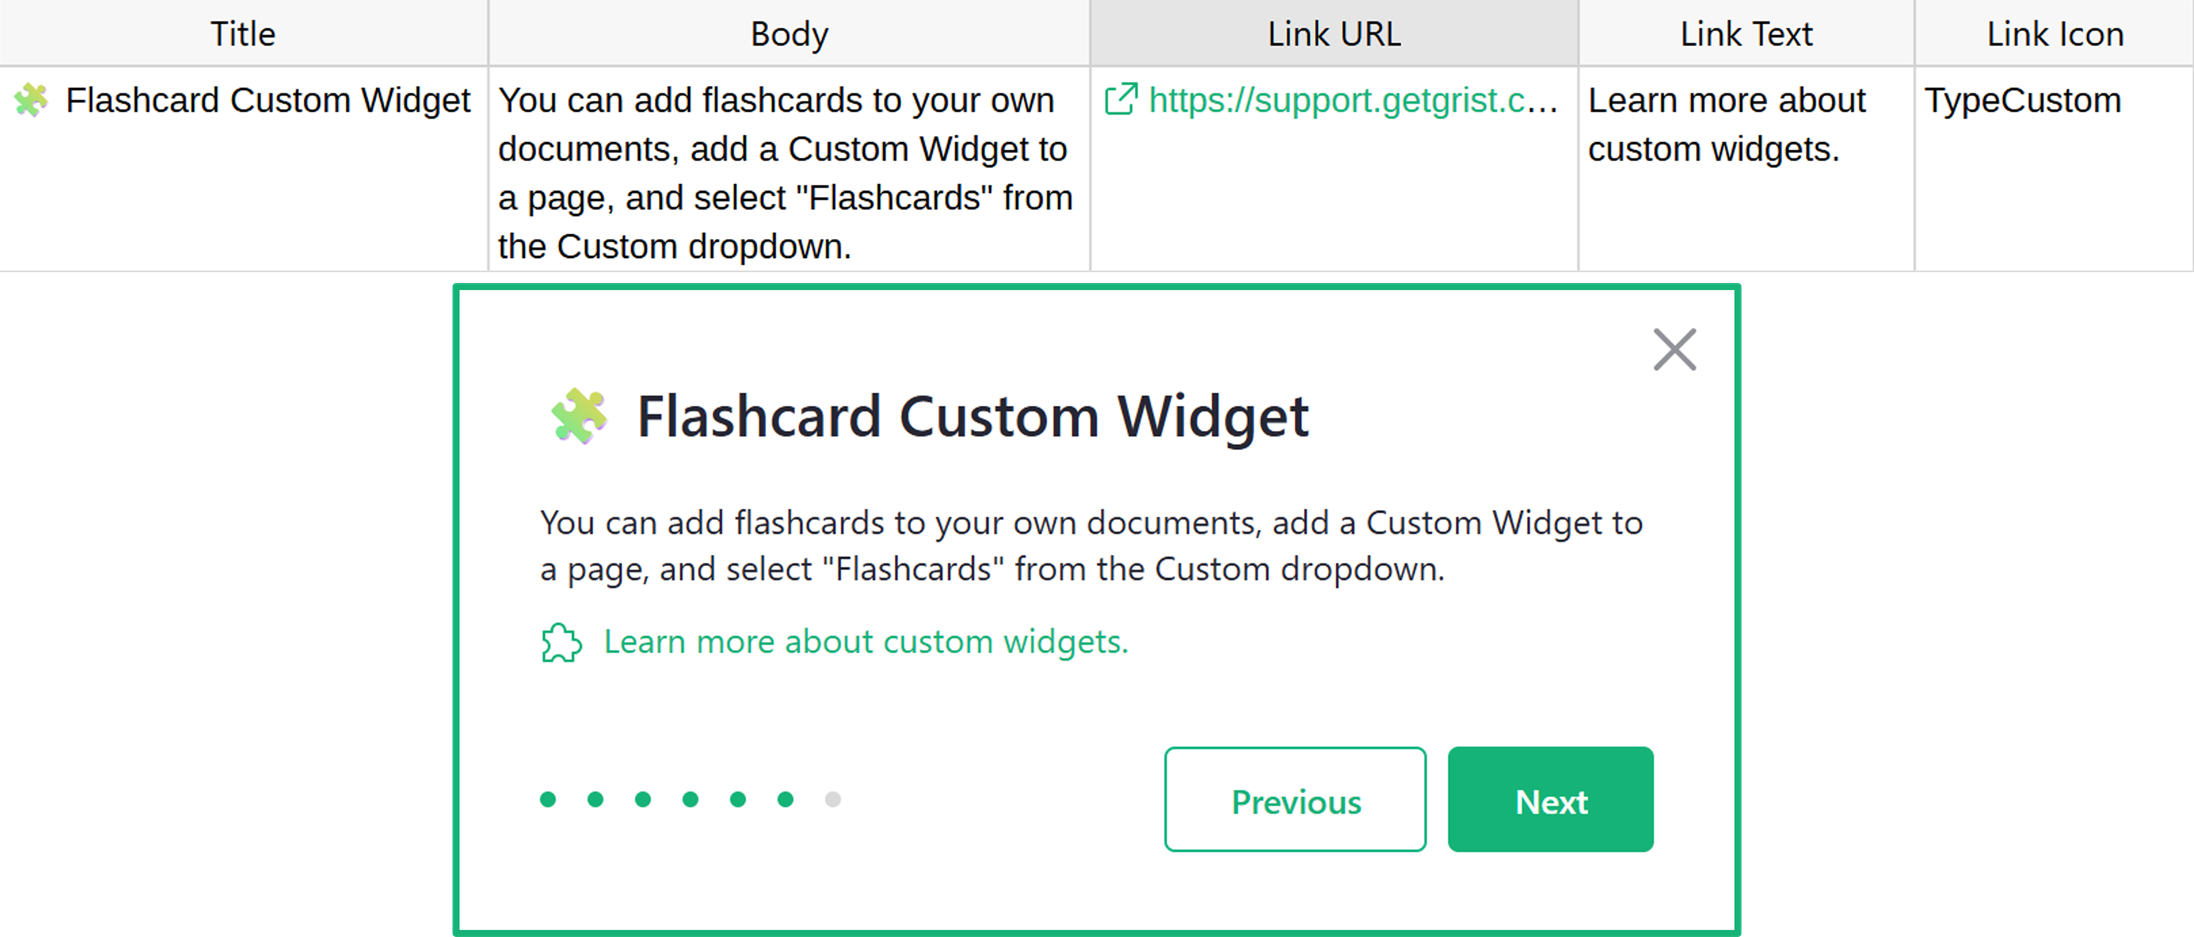
- Link URL (optional): Text column for an additional link in the tooltip.
- Link Text (optional): Text column for the display text of the link.
- Link Icon (optional): Text column specifying an icon to display before the link. Available icons are listed here.
Where did my GristDocTour table go?
The GristDocTour table is hidden by default to keep the focus on your document’s actual data. Since it only controls the display of tooltips, it’s treated more like metadata. You can always access it under Raw Data.
Adding anchor links#
Your document tour can point to specific cells and pages using anchor links.
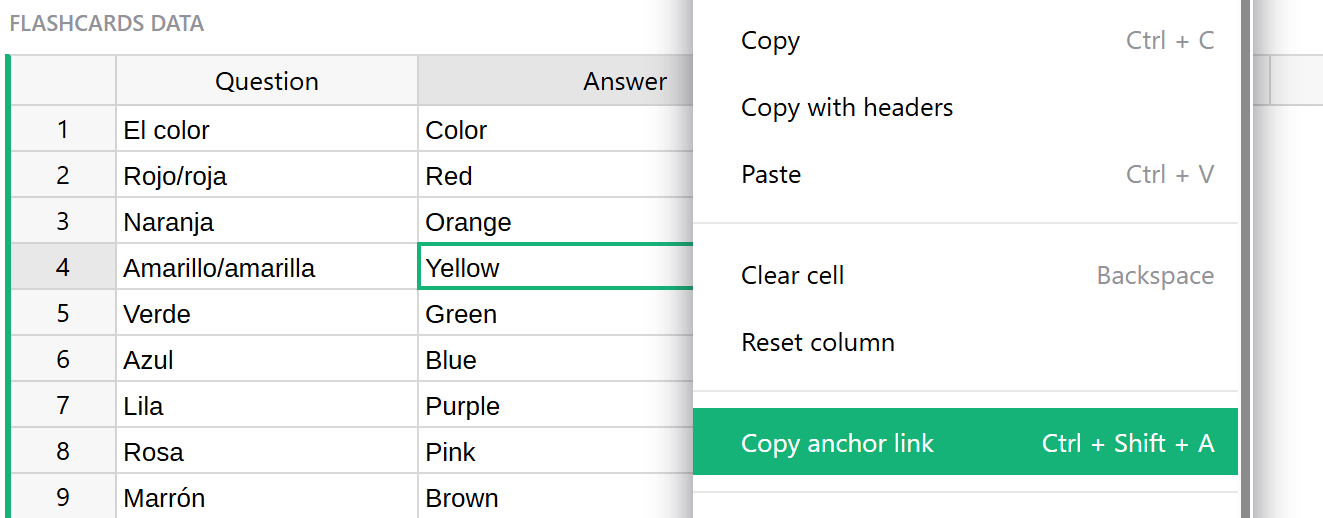
You can copy an anchor link to a cell by pressing ⌘ ⇧ A (Mac) or Ctrl + Shift + A (Windows) while the cell is selected. This option is also available via the row menu as “Copy anchor link.” The link will be placed in your clipboard, ready to paste into the Location Cell column.
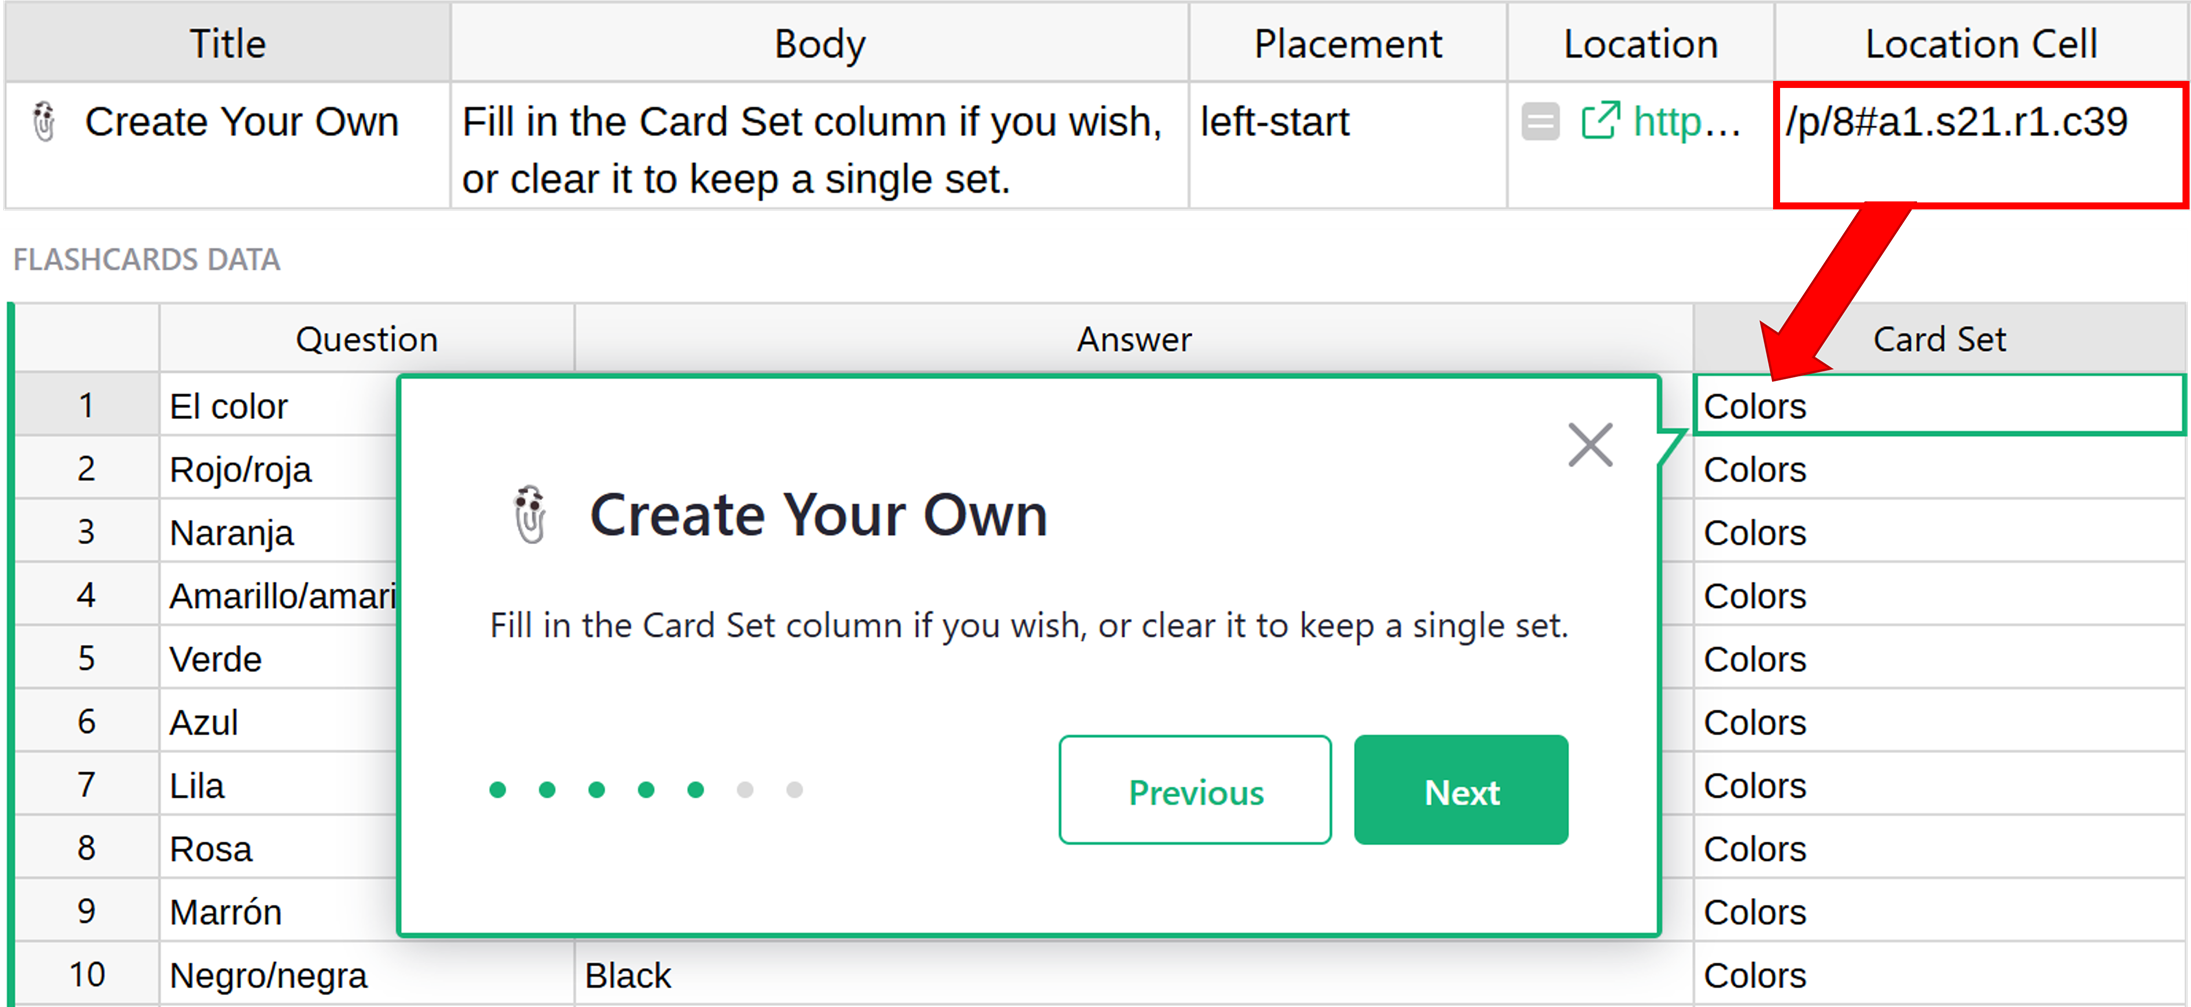
Use ⌘ + V (Mac) or Ctrl + V (Windows) to paste the anchor link into the Location Cell column of your GristDocTour table. You’ll want to delete everything prior to /p/.
For example, if your anchor link is:
https://templates.getgrist.com/keLK5sVeyfPk/Flashcards/p/8#a1.s21.r1.c39
…delete everything except
/p/8#a1.s21.r1.c39
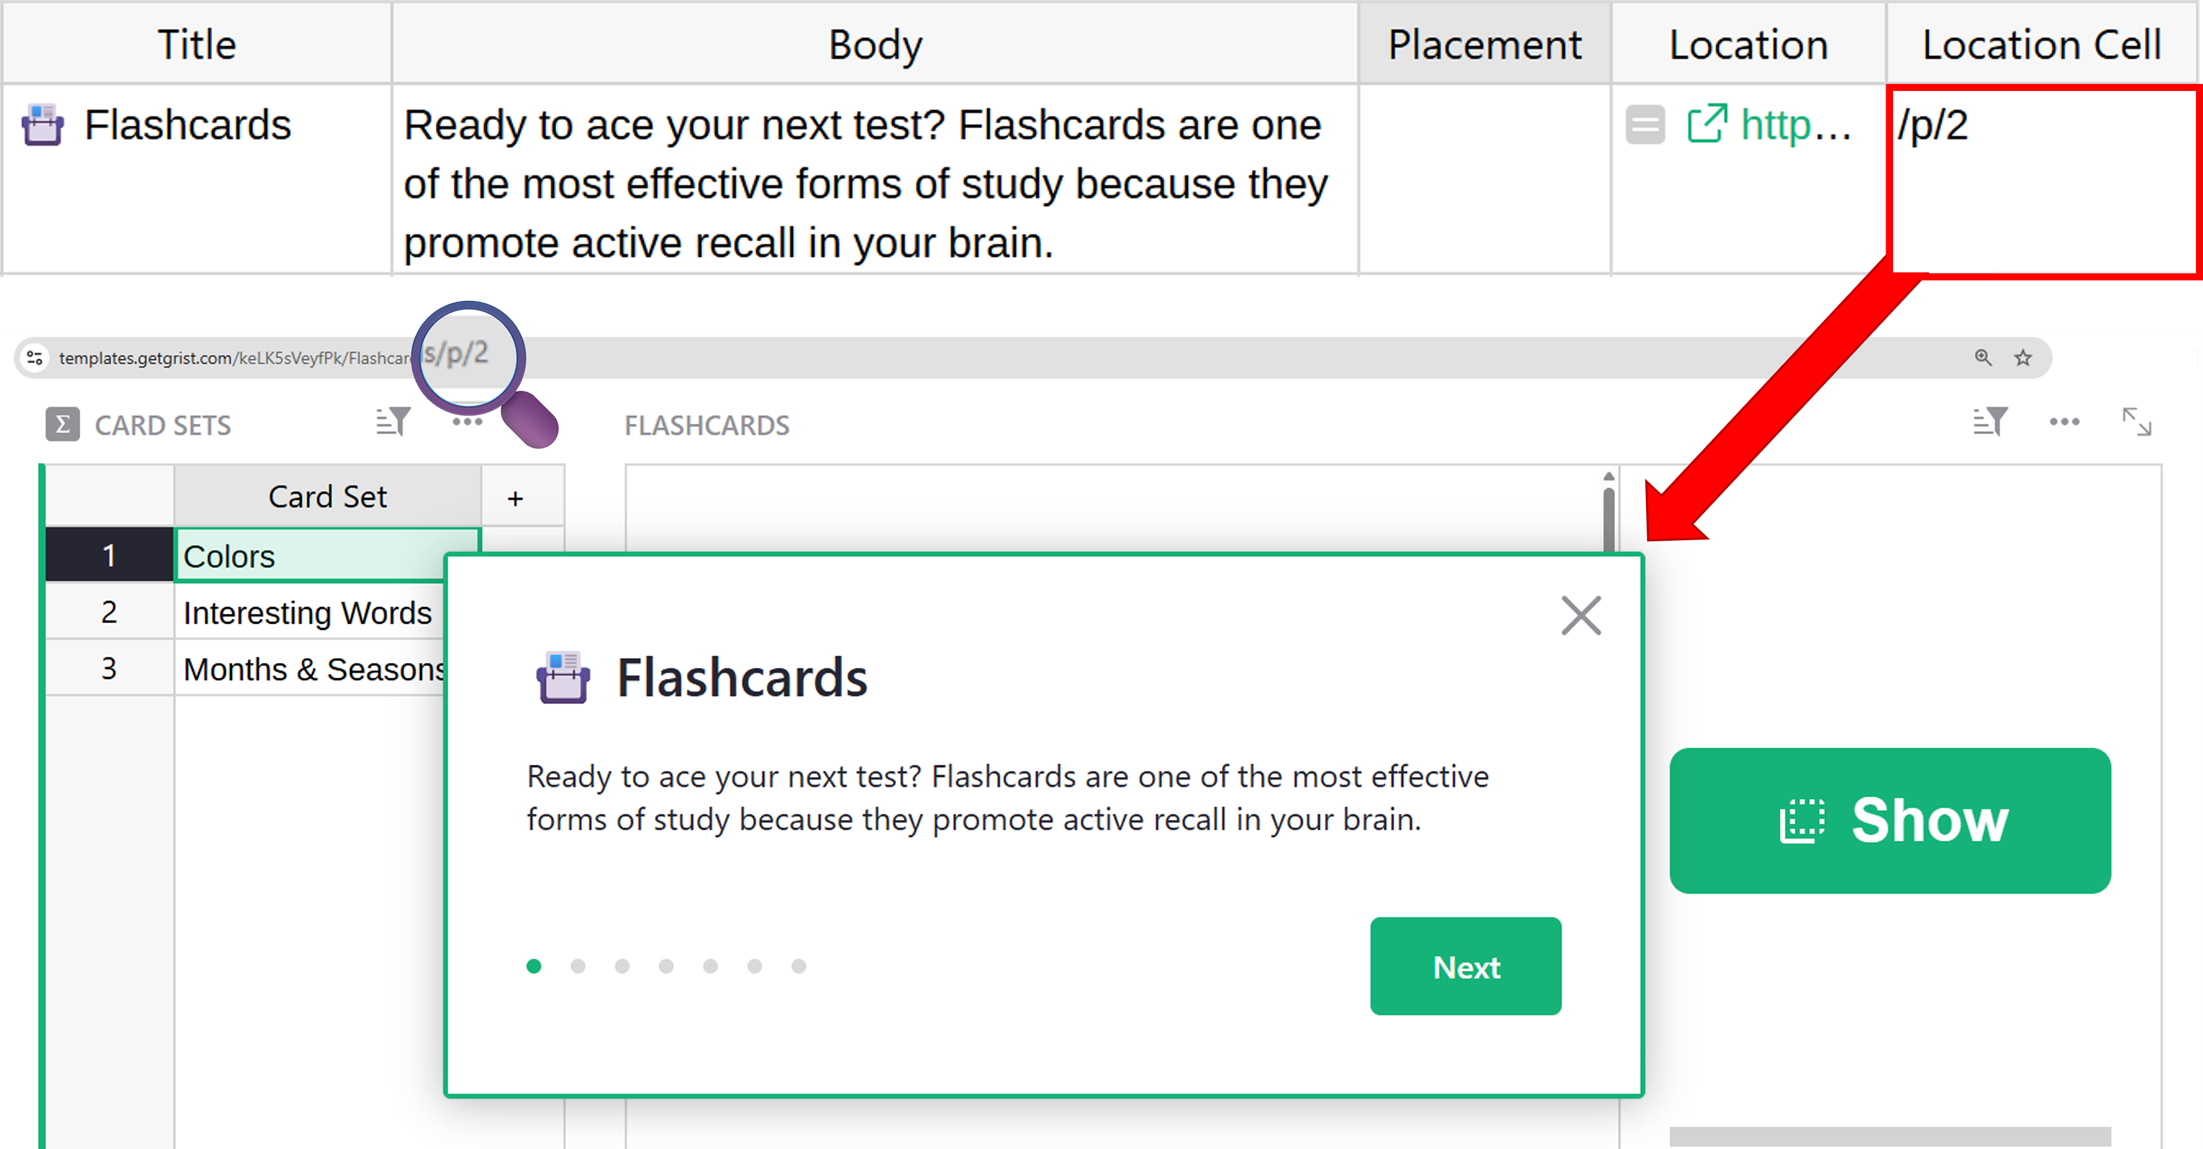
To place the document tour popup on a specific page, you can simply copy the end of the URL that contains the page number, /p/#, and paste this into the Location Cell column of your GristDocTour table.

Reviewing your document tour#
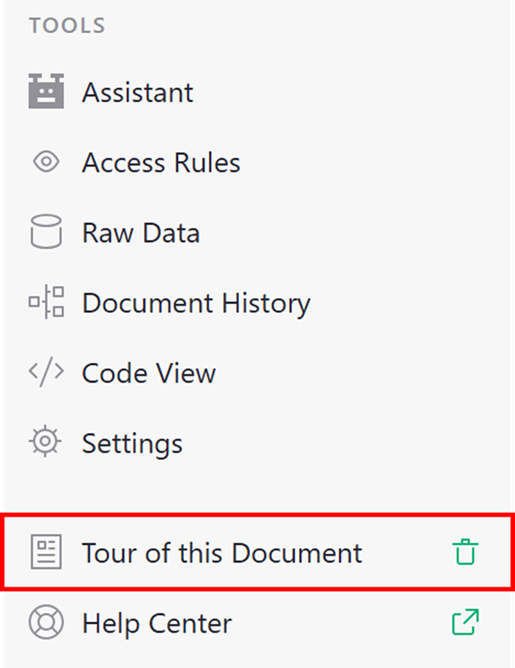
When initially creating your document tour, it is useful to see the popups and quickly make any changes. In a single window, that requires a lot of clicking back and forth. Open your document in two browser windows. In one window, pull up the GristDocTour table under Raw Data. In the other window, view your document tour on demand by clicking ‘Tour of this Document’ at the bottom of the left-hand navigation panel.

Sharing your document tour#
To share your document tour, simply share your document. The document tour will start automatically the first time a user accesses the document. After that, they can access the tour at anytime by clicking ‘Tour of this Document’ at the bottom of the left-hand navigation panel.
💡 Tip:
When sharing a URL to your document, you can force the document tour to appear—regardless of whether the user has seen it before—by appending #repeat-doc-tour to the end of the URL.