Webhooks#
Webhooks enable you to notify external services whenever rows are added to a table or if existing rows are modified.
You can configure webhooks from the ‘Document Settings’ page. Click ‘Settings’ under the ‘Tools’ menu found at the bottom of the left-hand navigation panel while viewing a document.

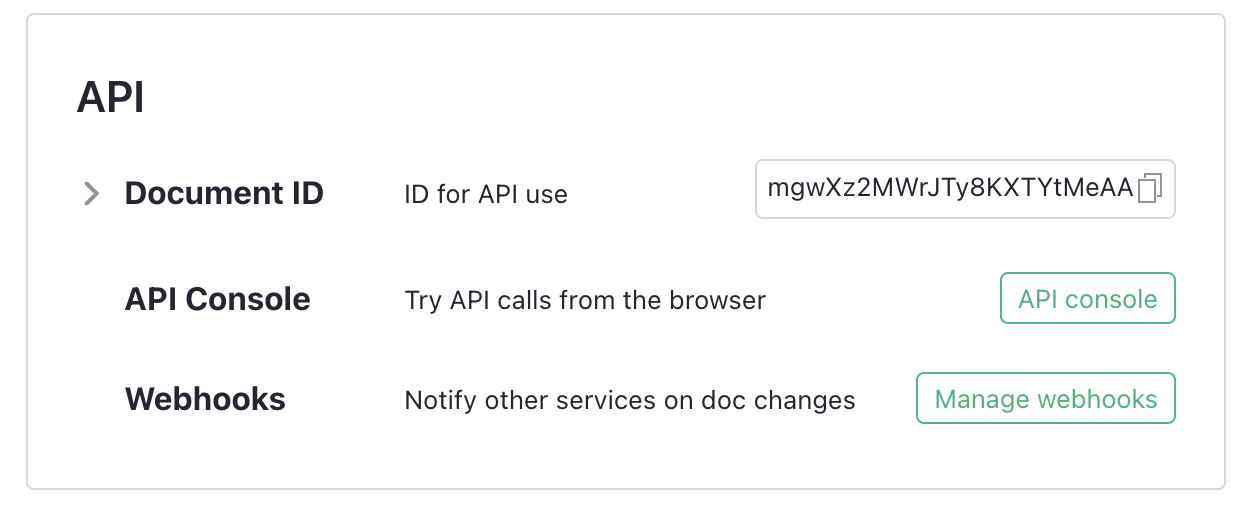
Under the ‘API’ section of ‘Document Settings’, click on the ‘Manage Webhooks’ button.

This will enable you to define webhooks for your document, where each card in this settings page represents a webhook for your document.

Configuration#
Each webhook has several fields. Some fields are defined by the user, and other fields are read-only and used to record information about the processing of the webhook. Not all fields are required.
- Name: A short, descriptive name given to the webhook.
- Memo (optional): A longer description of the webhook’s purpose.
- Event types: Whether adding or modifying rows triggers a webhook.
- Table: The table that will trigger this webhook.
- Filter for changes in these columns (optional): A semicolon-separated list of column IDs. If an existing row is edited, the webhook will trigger only if one of the filtered columns was changed, and if the webhook is configured to trigger on modification. If a webhook triggers when adding a row, it does not matter which columns are defined when the new row is added.
- Ready column (optional): A boolean, or Toggle, column on the table that determines if the row is visible to webhooks. While the toggle in the “Ready column” is false, changes to that row do not trigger the webhook. When the column becomes true, the row becomes visible to the webhook, and triggers the “add” event. While the column is true, further changes to the row trigger “update” events.
- URL: The remote URL of the service that the webhook will notify
of added or changed rows. When self-hosting, only external services
listed by the
ALLOWED_WEBHOOK_DOMAINSenvironment variable are allowed. Note that there are security concerns with allowing any domain, as internal Grist services may become vulnerable to manipulation. - Header Authorization (optional): Credentials to be supplied to
the webhook endpoint in the
AuthorizationHTTP header. Not all endpoints require credentials. This is a static string. A common usage of this field is to provide an API token as required by the webhook’s URL. - Enabled: Whether the webhook should monitor its configured table for changes or not. If the webhook is disabled, no changes to its table will trigger it.
The following fields are informational and read-only:
- Webhook id: An automatic, internally-generated unique ID for the webhook.
- Status: A JSON object that summarises the current status of the webhook, as well as the results regarding the number of times it has been invoked. This includes any potential error messages or statuses the webhook may have received when attempting to send a payload to the remote address.
Security#
In untrusted self-hosted environments, the internal Grist endpoints can be exposed if any user is allowed to create documents and configure webhooks. There are two ways to mitigate this risk:
-
Use the
ALLOWED_WEBHOOK_DOMAINSenvironment variable to list the allowed domains that webhooks can use. -
Use the
GRIST_HTTPS_PROXYenvironment variable to restrict webhook invocations to go through that proxy, along with settingALLOWED_WEBHOOK_DOMAINS=*. In this way, all domains are allowed, but the webhooks will send requests through the configured proxy, thus safeguarding your internal Grist endpoints. This is the configuration that Grist Labs uses in our cloud-hosted environment.
In a trusted environment where malicious users are not expected to
exist, setting ALLOWED_WEBHOOK_DOMAINS=* alone may be sufficient
without needing to configure a proxy.
Payloads#
When a webhook is triggered, the rows that matched the webhook’s conditions will generate a JSON array as the webhook’s payload. Here is an example payload.
[
  {
    "id": 29,
    "manualSort": 29,
    "Title": "Trophy",
    "URL": "https://example.com/buy/Trophy",
    "Price": 60,
    "Purchase_status": "wishlisted",
    "Currency": "USD",
    "Play_status": "Not started",
    "Box_art": null,
    "Price_CAD_": 82.362
  },
  {
    "id": 24,
    "manualSort": 24,
    "Title": "Dataman",
    "URL": "https://example.com/buy/Dataman",
    "Price": 50,
    "Purchase_status": "own digitally",
    "Currency": "EUR",
    "Play_status": "Finished",
    "Box_art": null,
    "Price_CAD_": 74.71
  }
]
Multiple rows can simultaneously trigger the same webhook. In that case, those rows will be sent together in the same payload. The ‘Ready Column’ in the webhook’s configuration can be useful for gating which rows should be sent together.
Error conditions#
If a webhook fails to deliver its payload to the specified URL, it will keep retrying periodically. The ‘Status’ column in the webhook configuration can be useful for diagnosing any such problems, or to verify that the payloads were delivered successfully.
Webhook queue#
Webhook payloads are delivered according to a batched queue. Attempts to reach an endpoint are removed from the queue when a successful delivery happens. In case there is a problem with the webhook configuration, it can be helpful to purge the webhook’s queue. The ‘Clear Queue’ button in the webhook’s configuration page will remove any pending invocations of the webhook and discard the associated payloads.