Page widget: Calendar#
The calendar widget allows viewing data in a calendar view. In Grist, event data is stored in a data table. Then, the calendar widget can be configured to display that data.

Setting up your data#
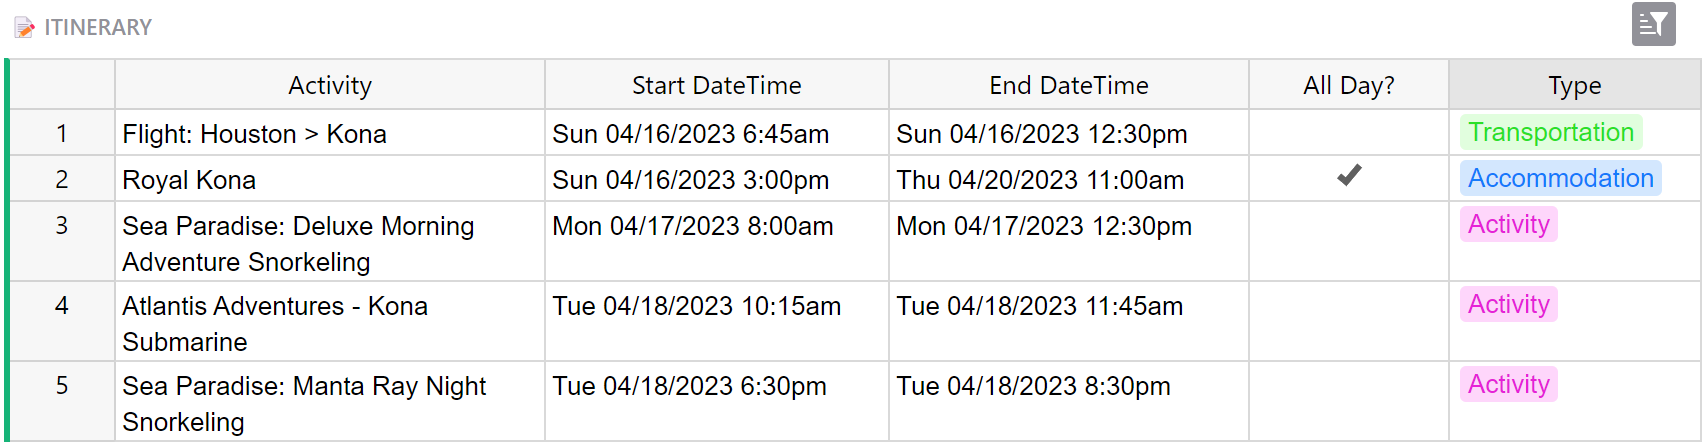
In your data table, you will need two columns of data, with the option to add three additional data columns:
- Title: Text column, containing the title of your event.
- Start Date: Date or DateTime column, containing the date, or date and time, that the event begins.
- (Optional) End Date: Date or DateTime column, containing the date, or date and time, that the event ends.
- (Optional) Is All Day?: Toggle column, noting if an event is all day long.
- (Optional) Type: Choice or Choice List column, containing the event category and styling.
Configuring the calendar#
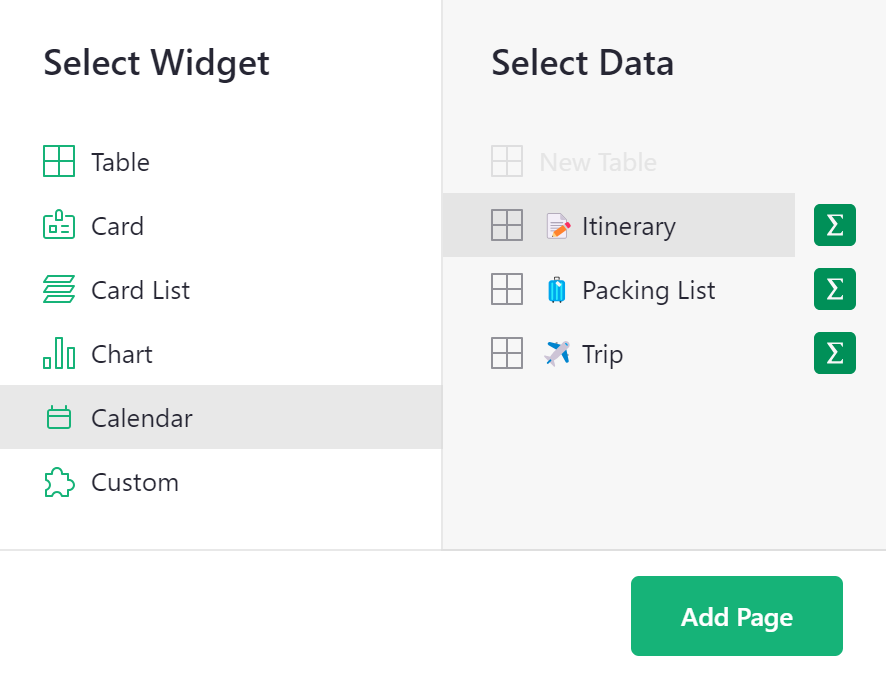
Add a calendar widget from the ‘Add New’ menu. Select the table containing your event data.
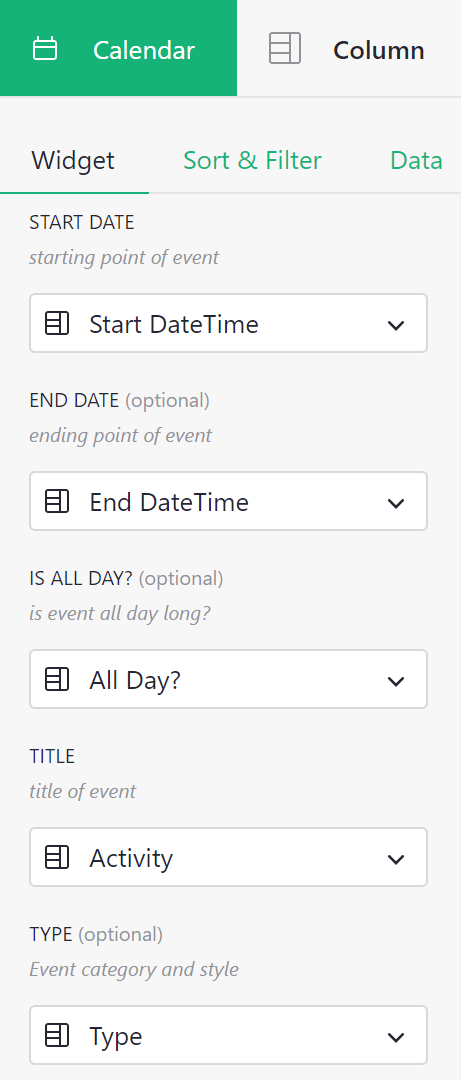
Configure the widget by selecting the columns in your data table that contain Start Date, End Date (optional), Is All Day? (optional), Title and Type (optional).
Adding, modifying, and deleting events#
Adding events#
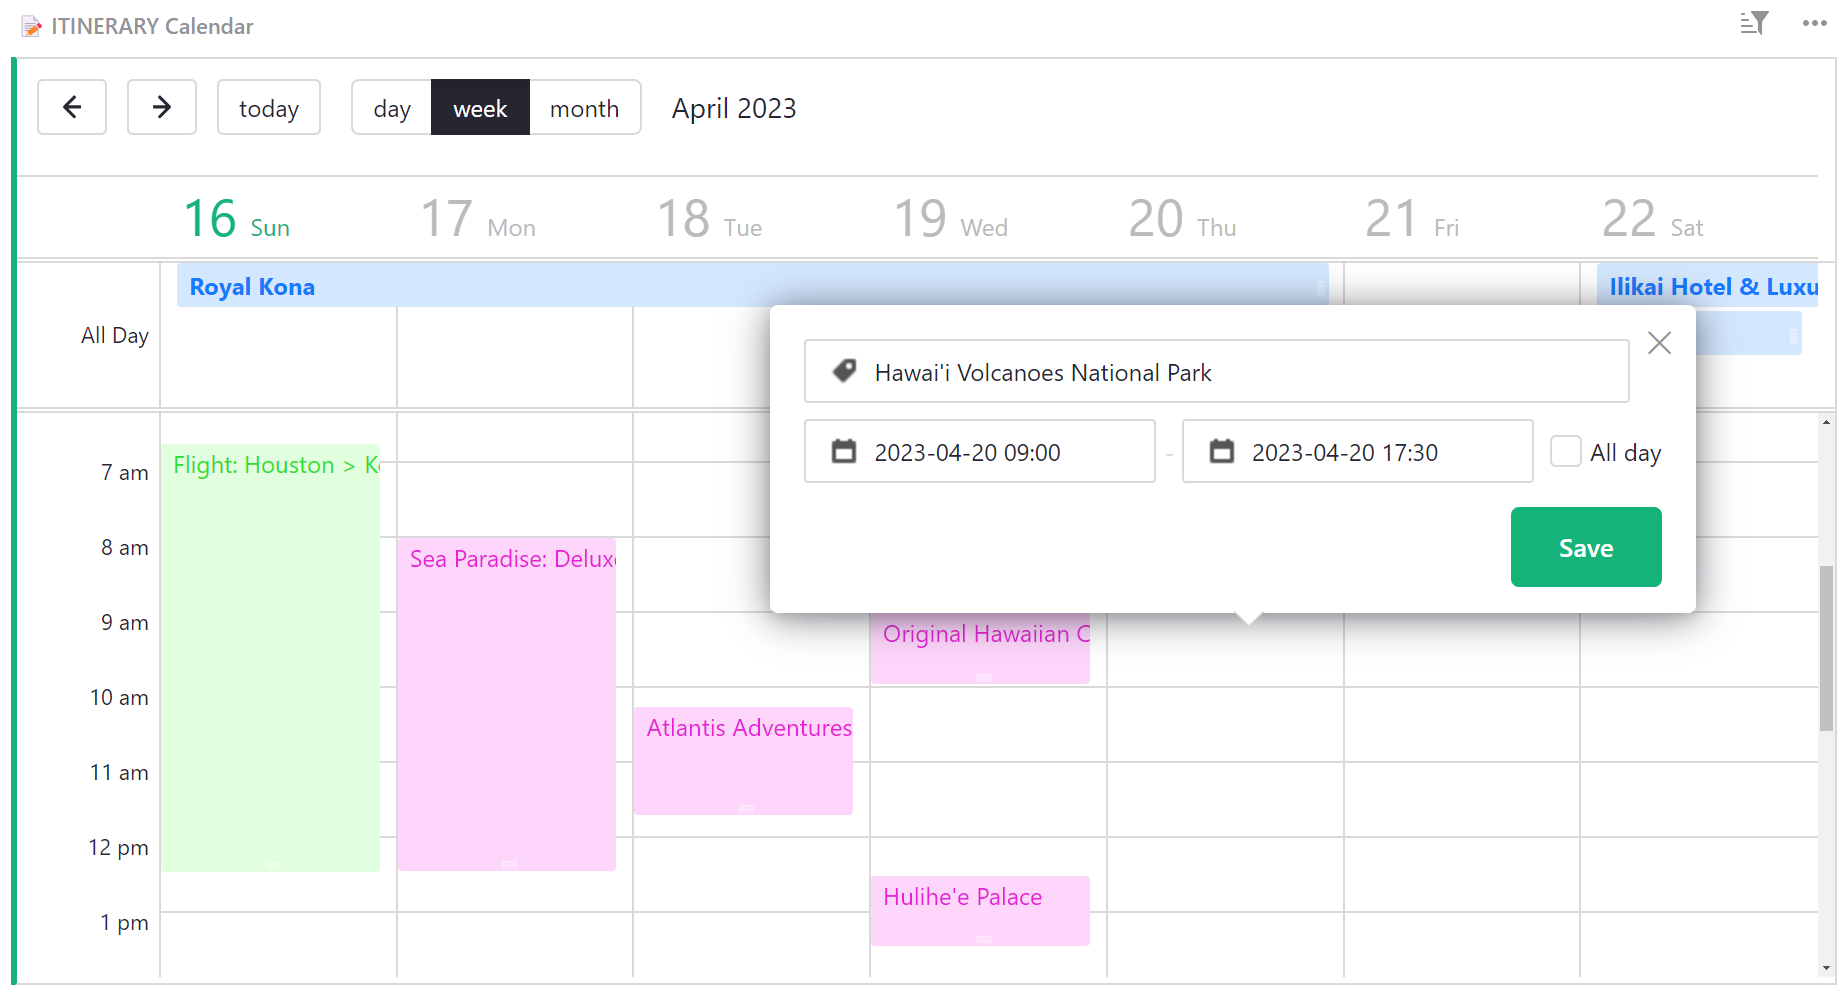
You can add a new event by double-clicking the start time for the event in the calendar widget. In the popup, you can add a title for the event and modify the start and end time. You also have the option to mark the event as ‘all day’.
Modifying events#
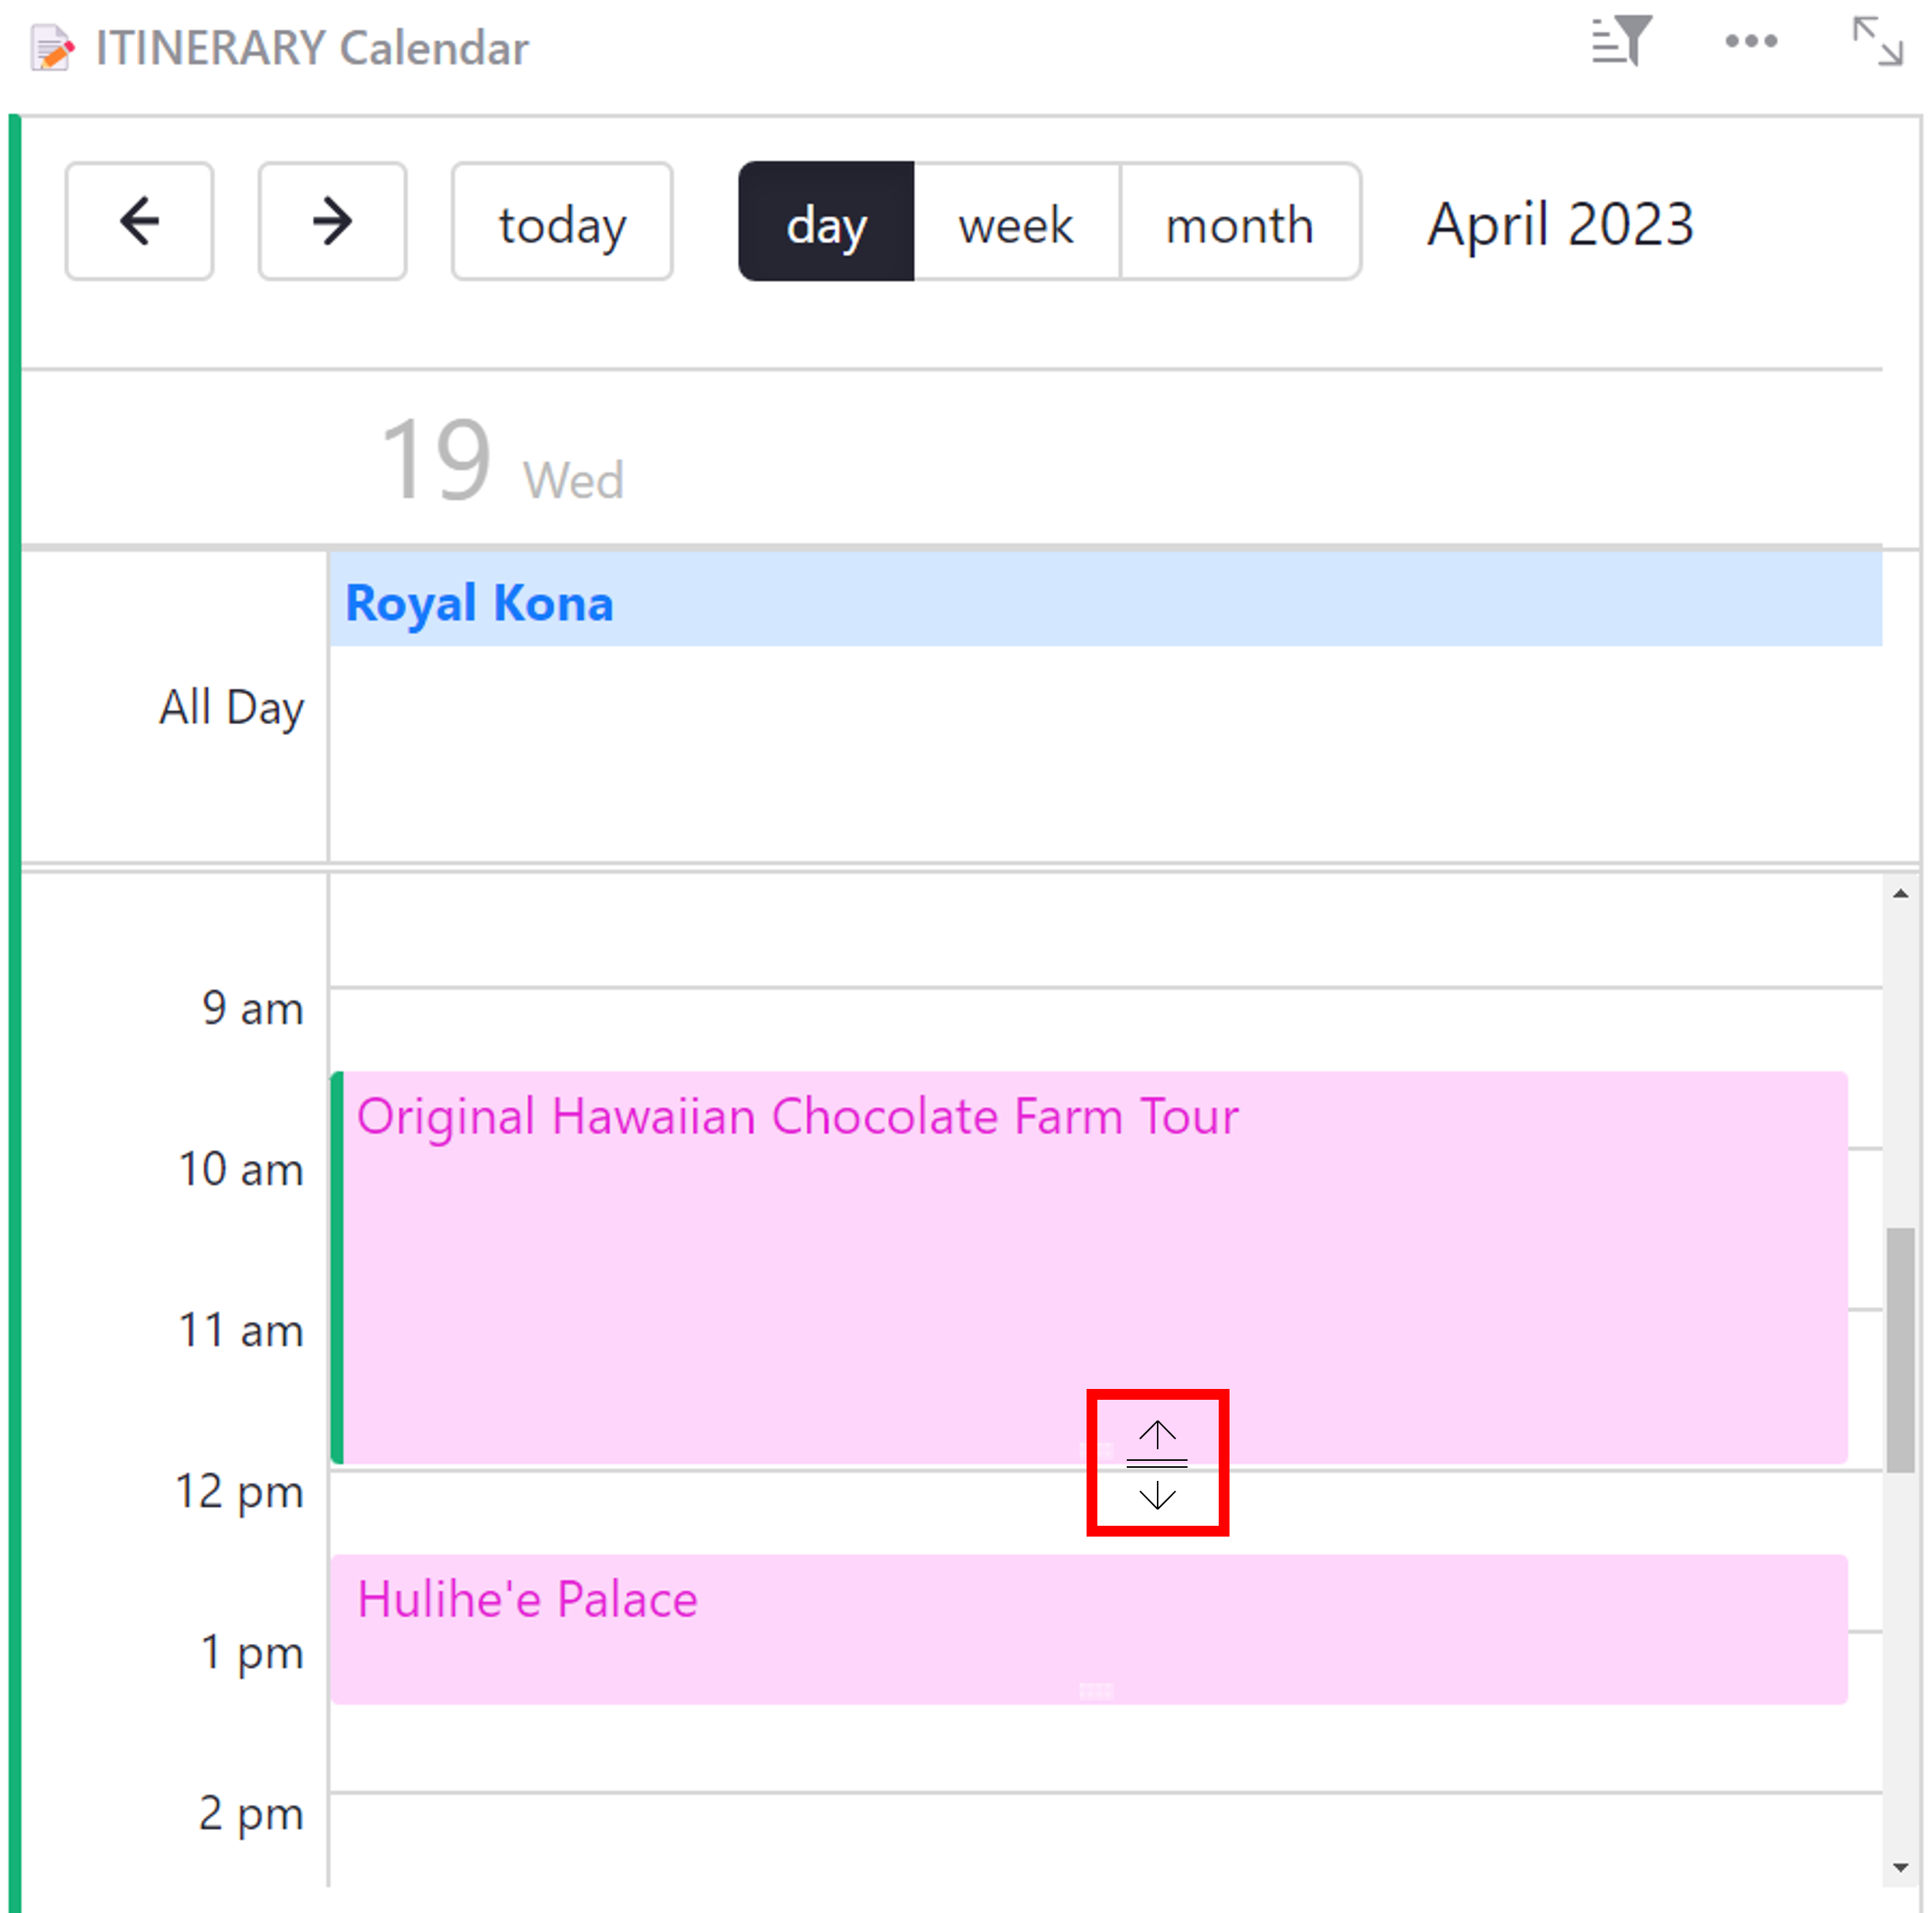
You can modify the start and end time of an event by clicking and dragging the event directly on the calendar.
To modify an event’s start time, click and drag from the middle of the event. When modifying start time, the duration of the event will remain the same.

To modify an event’s end time, click and drag from the bottom of the event. You’ll notice that the icon is slightly different from the icon that appears when modifying start time.
Any changes to start and end time will be made to the underlying data table so your data will always be consistent!
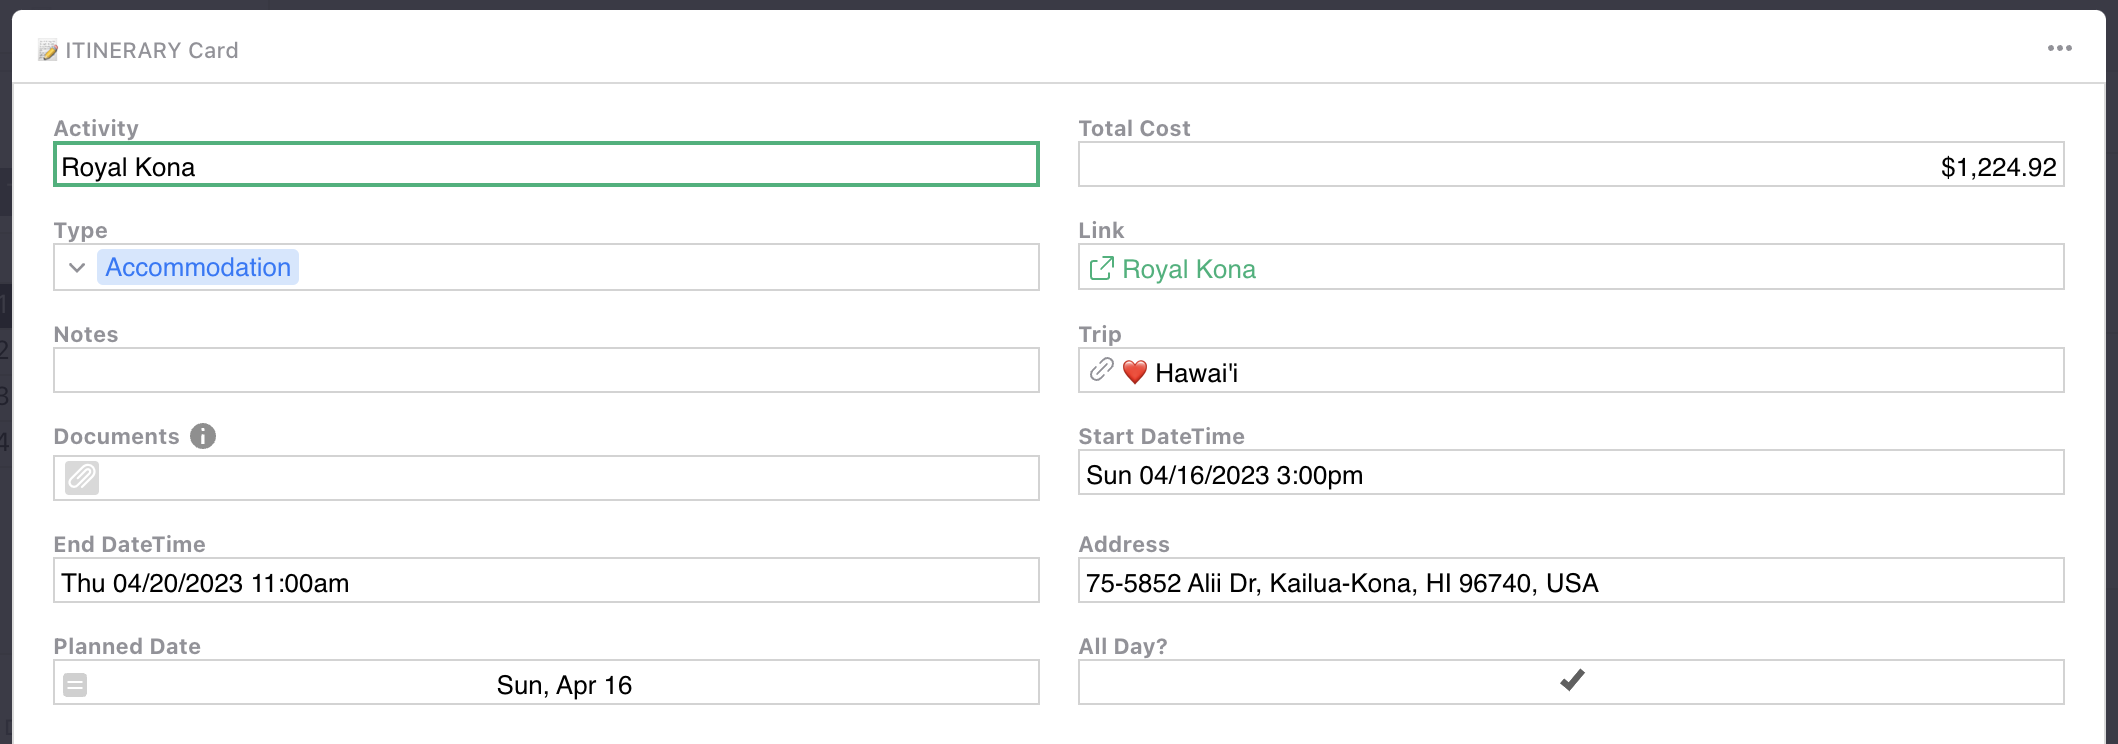
You can modify the details of any event from the event’s record card. Double click on an event to open its record card.
Deleting events#
To delete an event, double click the event on the calendar to open its record card. Open the dropdown menu from the top right corner of the record card, and select “Delete record” from the list.

Linking event details#
It might be useful to see more event details in a table or card widget.
This example will walk through a card widget.
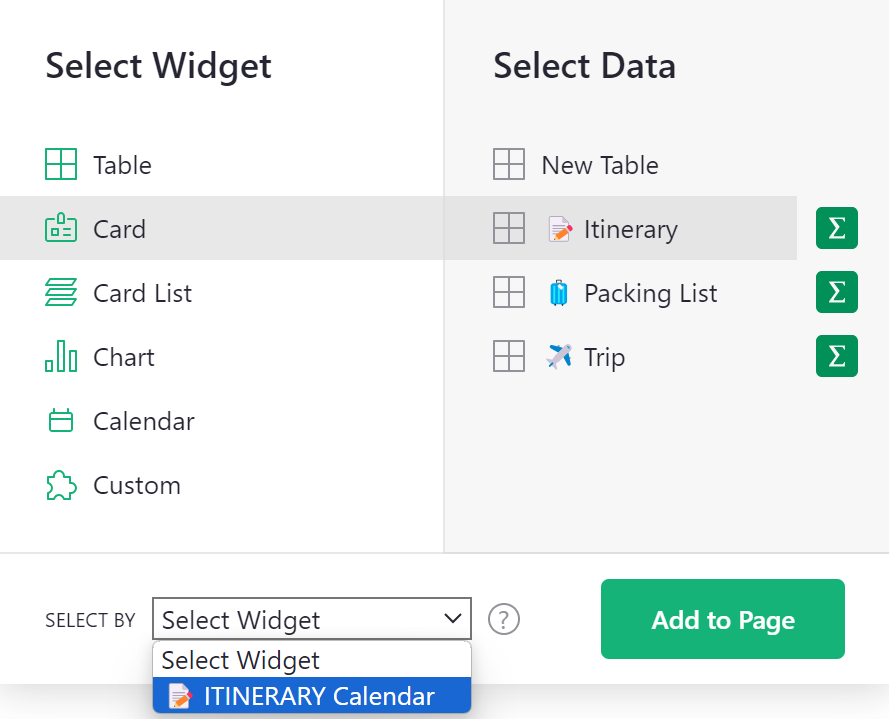
To create a linked view, add a new type of widget such as a table or a card, and select the same data table. Under ‘Select By’, select the calendar widget. Then, add to page.
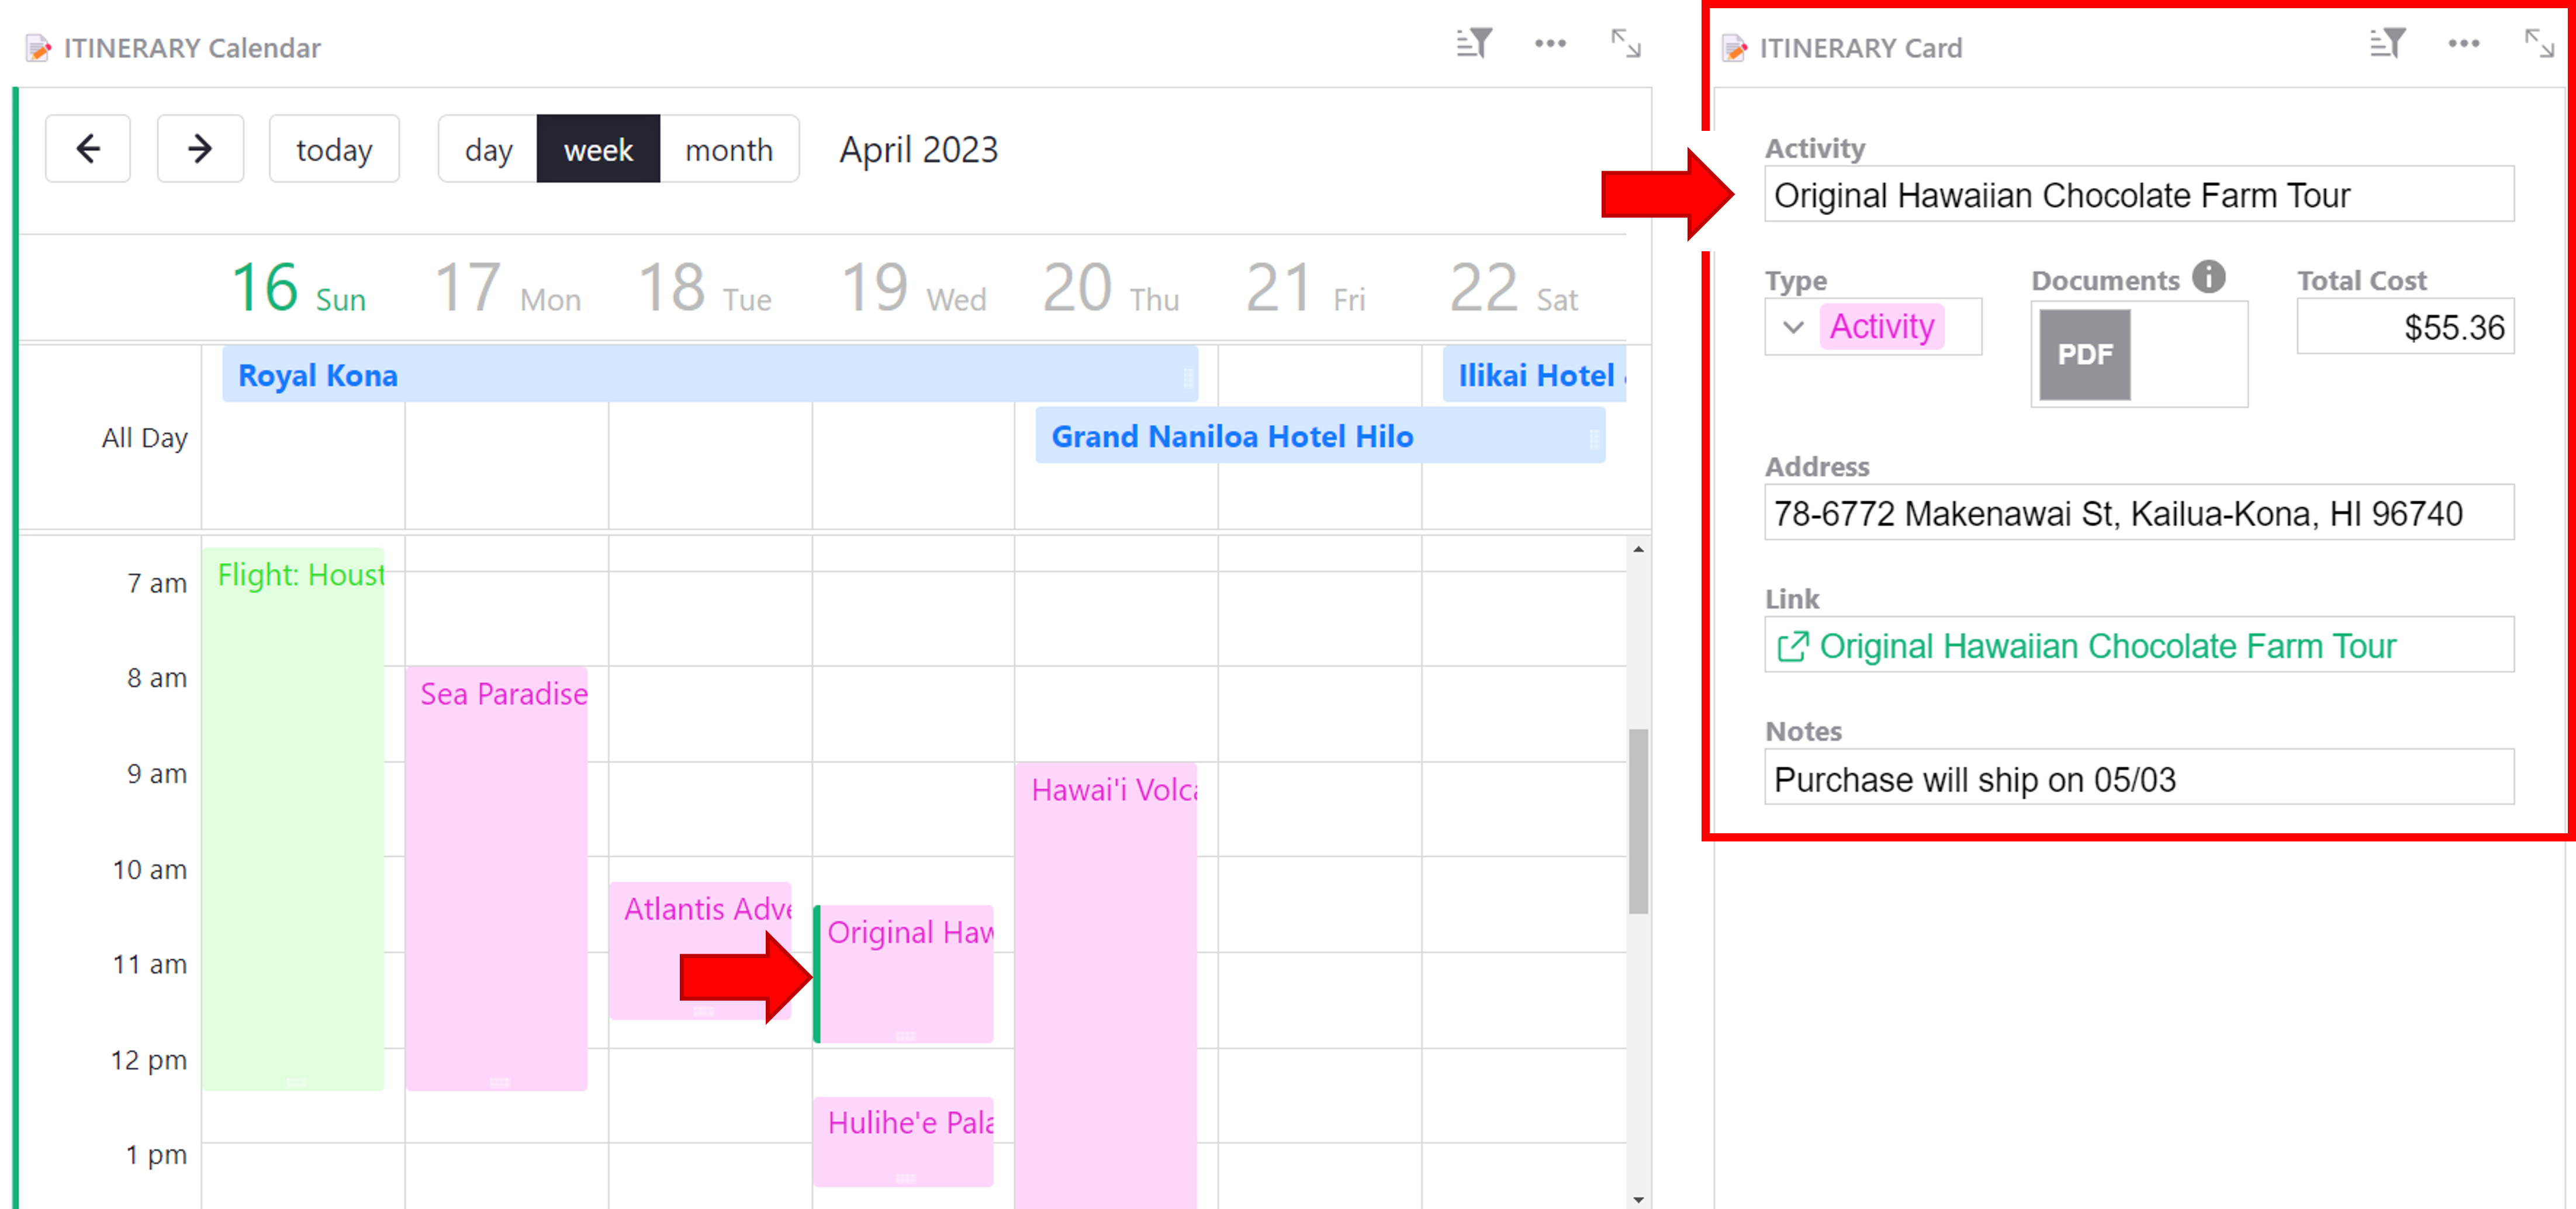
Now, when you click on an event in the calendar widget, the linked widget will update to show the details for the selected event.
Collapsing widgets
Drag the linked widget into the attic at the top of the page to collapse. The widget will still be linked but will take up less space on the page! Simply click the box to expand and view linked record details.
Read more on Custom Layouts.